How to Install a Tile Backsplash
A tile backsplash is the highest-impact weekend upgrade in a kitchen — it transforms the room for $150 to $400 in materials, far less than the $800-plus a pro charges to install one. The work is genuinely DIY with patience: the secret isn't artistic skill, it's a level ledger board, the right adhesive, and caulking the corners instead of grouting them. This guide walks the whole job over painted drywall, from dry-laying the layout to the final bead of caulk.
What You'll Need
🛠 Tools
📦 Materials
Safety First
- •Cut power at the breaker before removing any outlet or switch cover plate, and confirm the circuit is dead with a non-contact voltage tester before working near it. Tiling around live receptacles puts your hands and wet tools next to energized contacts.
- •Wear a NIOSH-rated dust mask or respirator and eye protection when cutting tile — the dust contains crystalline silica, which is hazardous to inhale.
- •A wet saw combines water and electricity: run it only from a GFCI-protected outlet and keep the cord up out of the water tray.
Step-by-Step Instructions
Plan the Layout and Buy Extra Tile
Measure each backsplash run (length times height) to get your square footage, then add 10 to 15 percent for cuts, waste, and a stash for future repairs — patterned tile and mosaics need the higher end. Find the center of your main wall or the cooktop and dry-lay a row of tile across the countertop to see how the pattern lands; shifting the starting point can turn an ugly sliver at one end into two balanced cuts. Note exactly where outlets, switches, and cabinet edges fall so you can plan those cuts before any adhesive goes up.
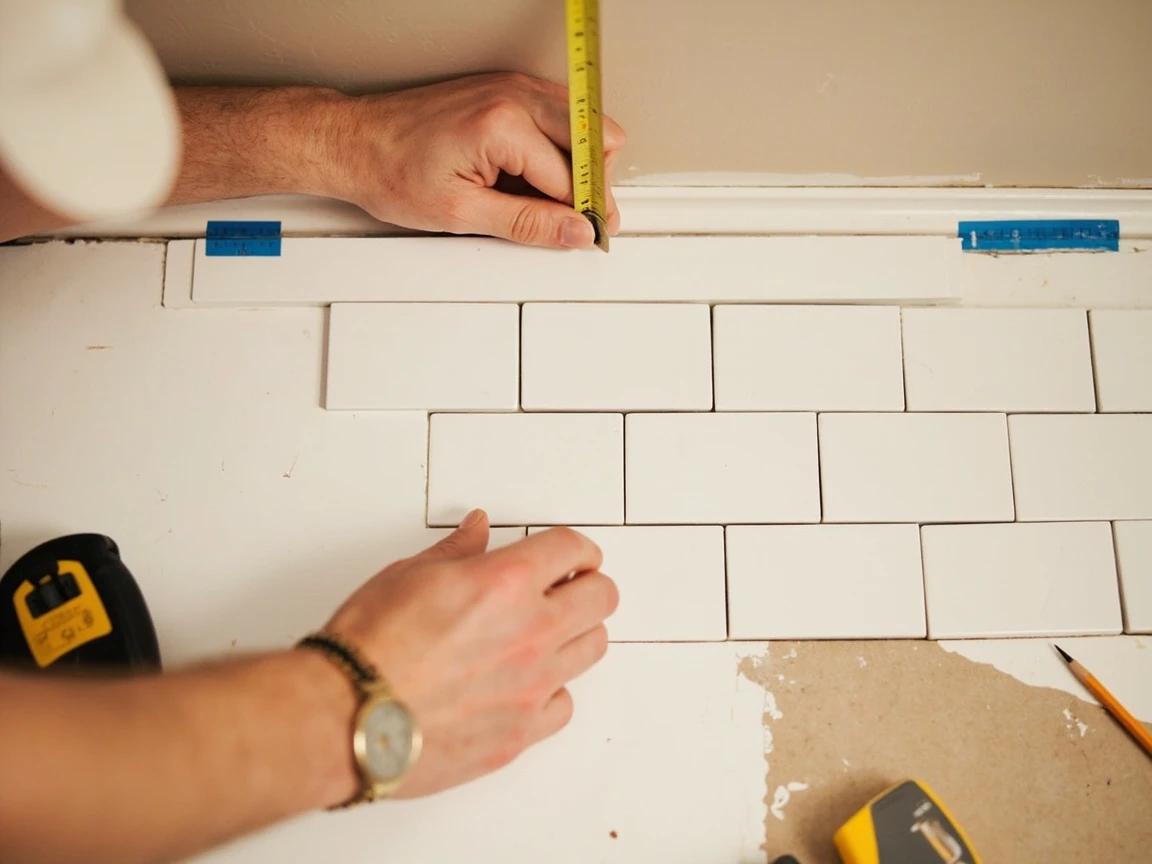
Buy all your tile in one trip from the same lot or dye-lot number — color shifts between production batches are common and painfully obvious across a backsplash. Keep the leftover overage; an exact match years later is nearly impossible.
Prep the Wall and Kill the Power
A backsplash bonds only as well as the surface under it. Wipe the wall with a degreaser to cut the invisible film of cooking grease, rinse, and let it dry fully. Lightly scuff any glossy or semi-gloss paint with 100-grit sandpaper so the adhesive can grip — flat or primed drywall is ready as-is. Then turn OFF the circuit feeding the backsplash receptacles at the breaker, confirm it's dead with a tester, and unscrew the outlet and switch cover plates so tile can run behind the plate line.
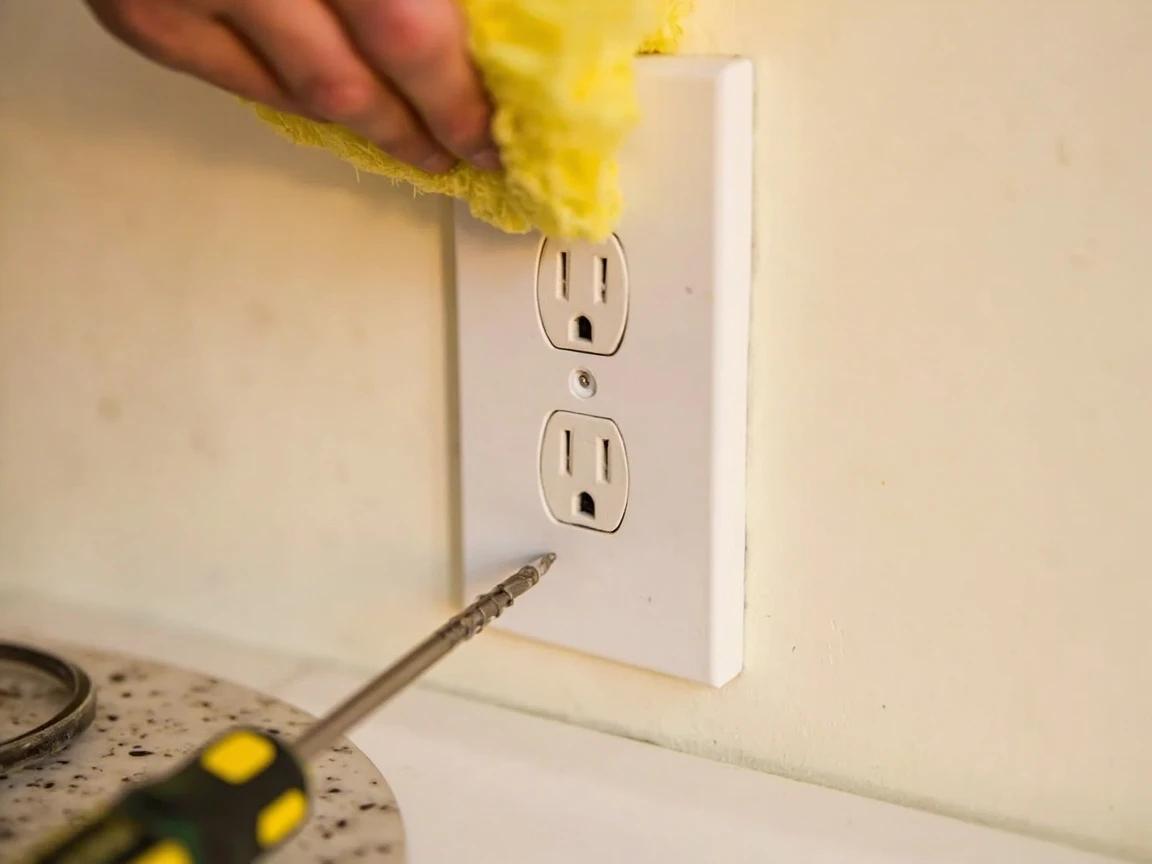
Cut power at the breaker before removing any cover plate and verify it's dead with a non-contact voltage tester. Working around live receptacles with wet tools and metal trowels is a shock hazard.
Snap a Level Line and Screw On a Ledger Board
Countertops are rarely perfectly level, so never use the counter as your baseline. At the low end of the run, measure up one full tile height minus 1/8-inch (your expansion gap at the counter), mark it, and extend a level line across the wall. Screw a straight scrap board — the ledger — along that line into studs or with drywall anchors; its top edge carries the weight of the first course so tiles can't slide or sag while the adhesive sets. You'll remove it later and fill the bottom row with cut tile and caulk.
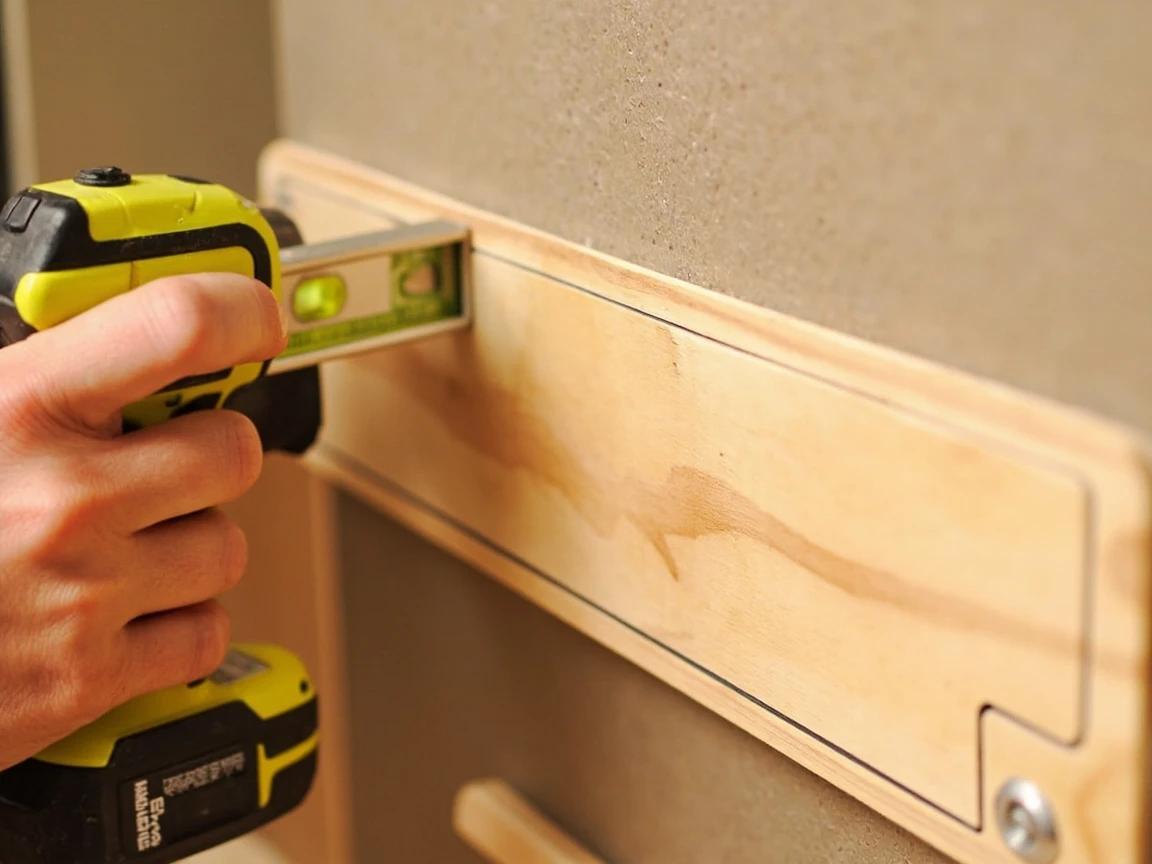
Start the field from the ledger line and work upward to the underside of the cabinets, saving the narrow bottom-row cuts for after the ledger comes off. A laser level speeds this up, but a good 2-foot level and a pencil work fine.
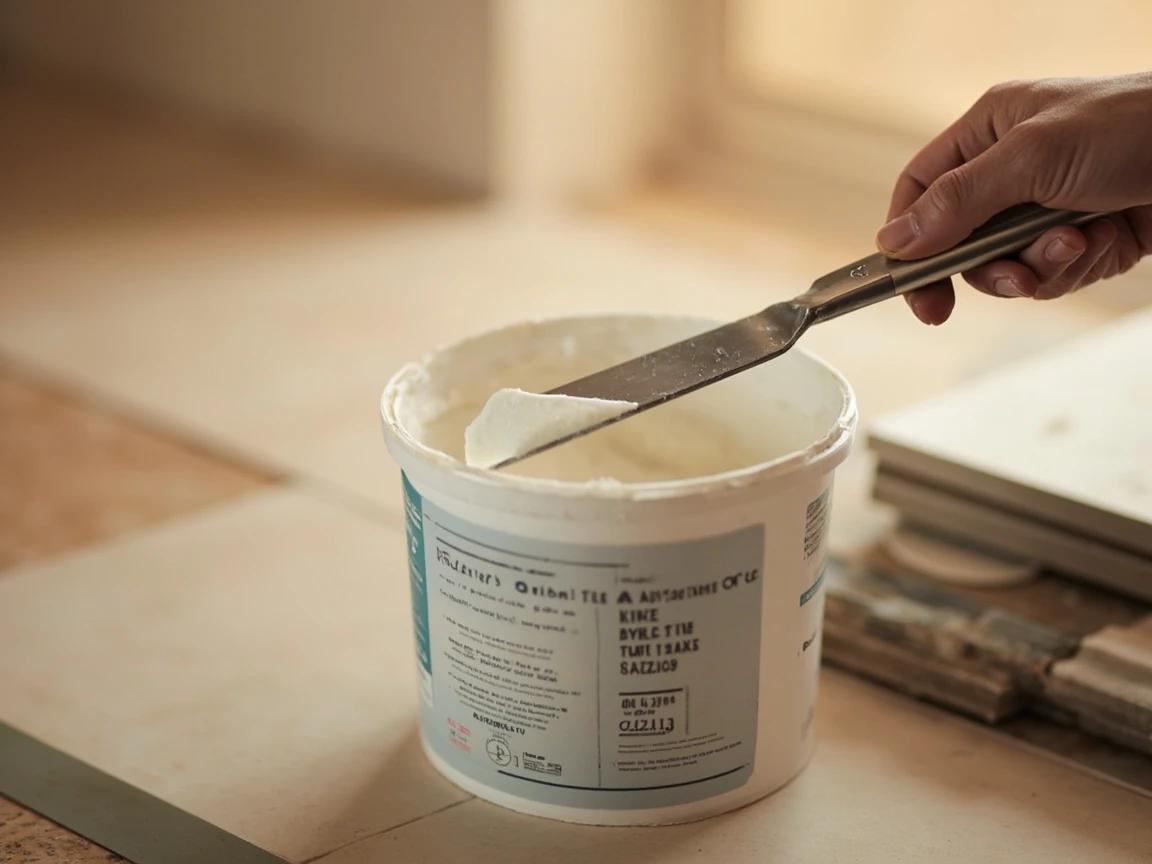
Choose the Right Adhesive
For a dry kitchen backsplash of ceramic or porcelain tile, premixed mastic is the simplest path — it's tacky enough to hold tile on a wall with no slump and needs no mixing. Use thinset mortar (mixed from powder to a peanut-butter consistency) instead for any wet zone, for natural stone, glass, or large and heavy tile, and behind a cooktop where heat is a factor. Read the container: it lists the trowel notch size and the exact tile types the adhesive is rated for.
Don't use mastic with glass tile or natural stone. Mastic dries too slowly behind translucent glass (it shows through and can trap moisture and mold) and isn't rated to bond stone — both require thinset.
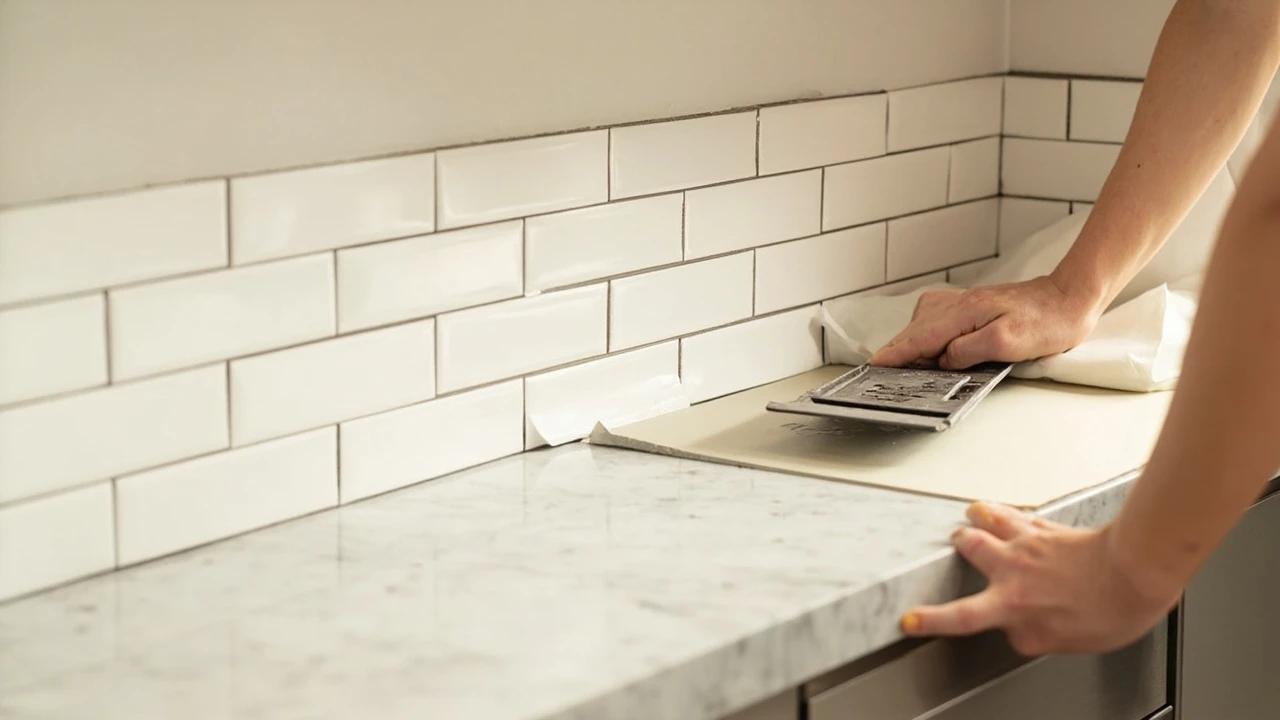
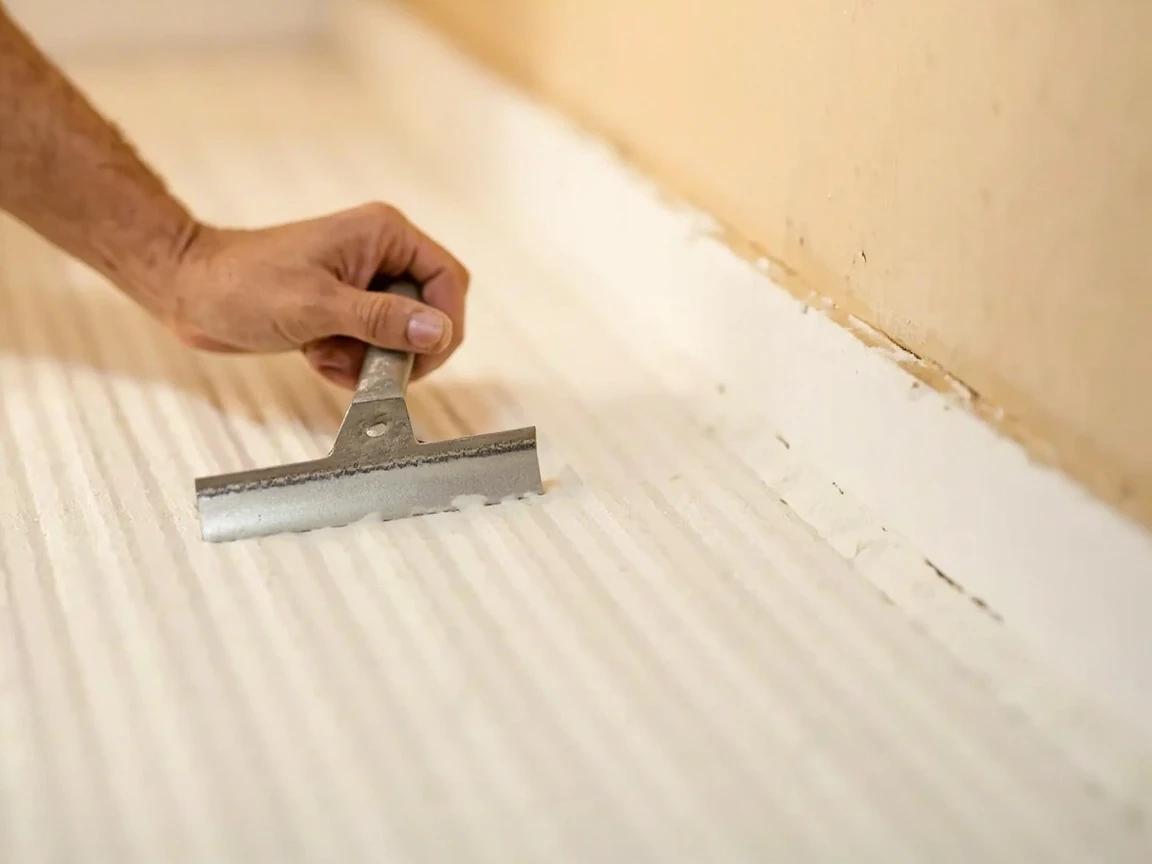
Spread and Comb the Adhesive
Work in sections about 2 to 3 feet wide so the adhesive doesn't skin over before you can set tile. Spread a thin coat on the wall with the flat side of the trowel, then hold the trowel at a 45-degree angle and drag it to leave even ridges — a 3/16-inch notch for tile up to 6 inches, a 1/4-inch notch for larger tile. Comb every ridge in the same direction so trapped air can escape as the tile beds in, and keep the adhesive off your layout line and outlet cut marks.
Spread only what you can tile in about 15 minutes. If the ridges have stiffened and lost their tack — a skin has formed — scrape it off and re-comb fresh adhesive; tile pressed into skinned-over adhesive will pop loose later.
Set the Tile
Starting at the ledger and your centerline, press each tile or mosaic sheet into the adhesive with a slight twist, keeping a 1/8-inch gap where the field meets the countertop. Use spacers (or the built-in lugs on mosaic mesh) to hold the joints even, and lay a level or a flat board across the face every few tiles — tap any tile that sits proud with a grout float or a rubber mallet over a wood block to bed it flush. Clean adhesive out of the joints and off the tile faces as you go, because cured adhesive in a joint leaves no room for grout.
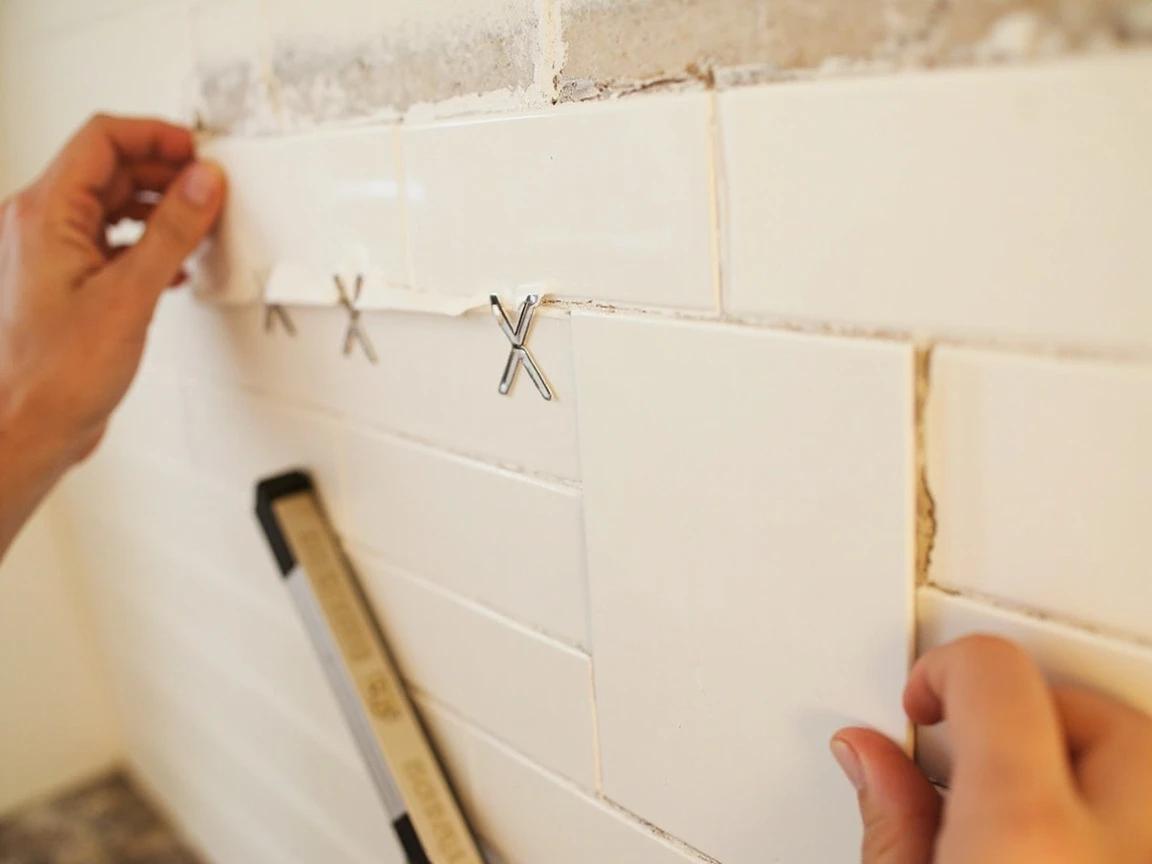
With mosaic sheets, stagger the sheet seams so they don't stack, and nudge the edge tiles with a putty knife to keep the spacing identical across the seam — a mismatched sheet seam is the clearest giveaway of a rushed DIY job.
Cut Tile Around Outlets and at the Ends
Measure every cut individually — walls and cabinets are rarely square. Straight cuts go fastest on a manual score-and-snap cutter; notches around outlets, curves, and L-shapes need a wet saw or a diamond-blade grinder, and small nibbles come off with tile nippers. Cut outlet tiles so the cover plate will overlap the cut edge by about 1/4-inch and hide it. Because the tile adds thickness, the receptacle usually has to come forward — add a box extender and longer screws so the device sits flush with the new surface (see how to replace an outlet if you're comfortable working in the box).

Wear a NIOSH-rated dust mask or respirator and eye protection when dry-cutting tile — the dust is crystalline silica and is hazardous to breathe. A wet saw controls the dust but mixes water and electricity, so power it from a GFCI outlet.
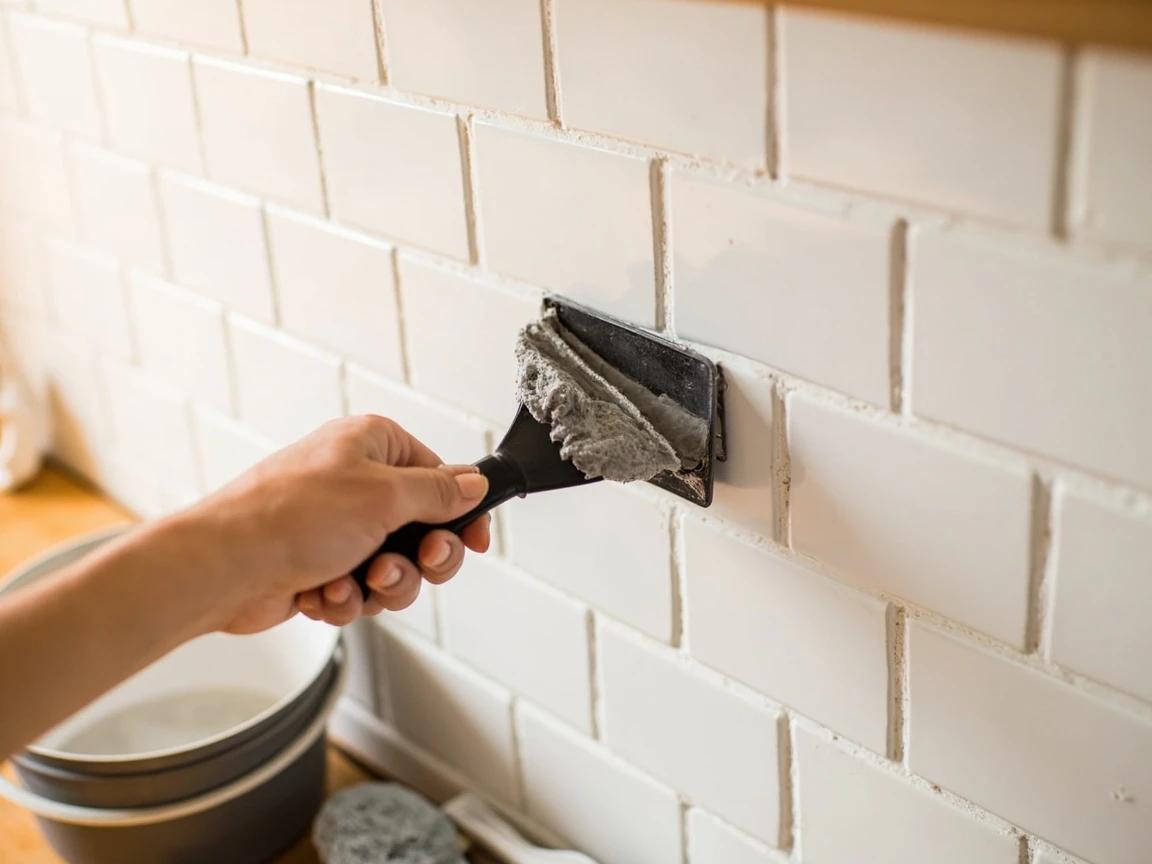
Cure, Then Grout the Joints
Let the adhesive cure per the label — usually a full 24 hours — then unscrew the ledger board and pull the spacers. Choose grout by joint width (unsanded under 1/8-inch, sanded for 1/8-inch and wider), mix to a peanut-butter consistency, and pack it into the joints with a rubber float held at a 45-degree angle, working diagonally across the tile so the float doesn't drag grout back out. Wait about 10 minutes, then wipe the haze off the faces with a damp — not soaking — sponge, rinsing often and shaping each joint with one light pass.
Grout only as much as you can clean before it hardens — about a 3-by-3-foot area at a time for a beginner. An hour later, buff off the last cloudy film with a dry microfiber cloth; the damp sponge always leaves a faint haze behind.
Caulk the Corners and Seal the Grout
Grout is rigid and cracks wherever two surfaces meet and move independently, so caulk — never grout — every change of plane: the joint where tile meets the countertop, inside corners, and where the tile meets the cabinets. Run a thin bead of flexible 100% silicone (color-matched or clear) and tool it smooth — the bead-tooling technique is the same as caulking a tub. Finally, if your grout is cement-based, brush a penetrating grout sealer onto the joints once it has cured the full time on the bag (usually 48 to 72 hours) to keep kitchen grease from staining them.
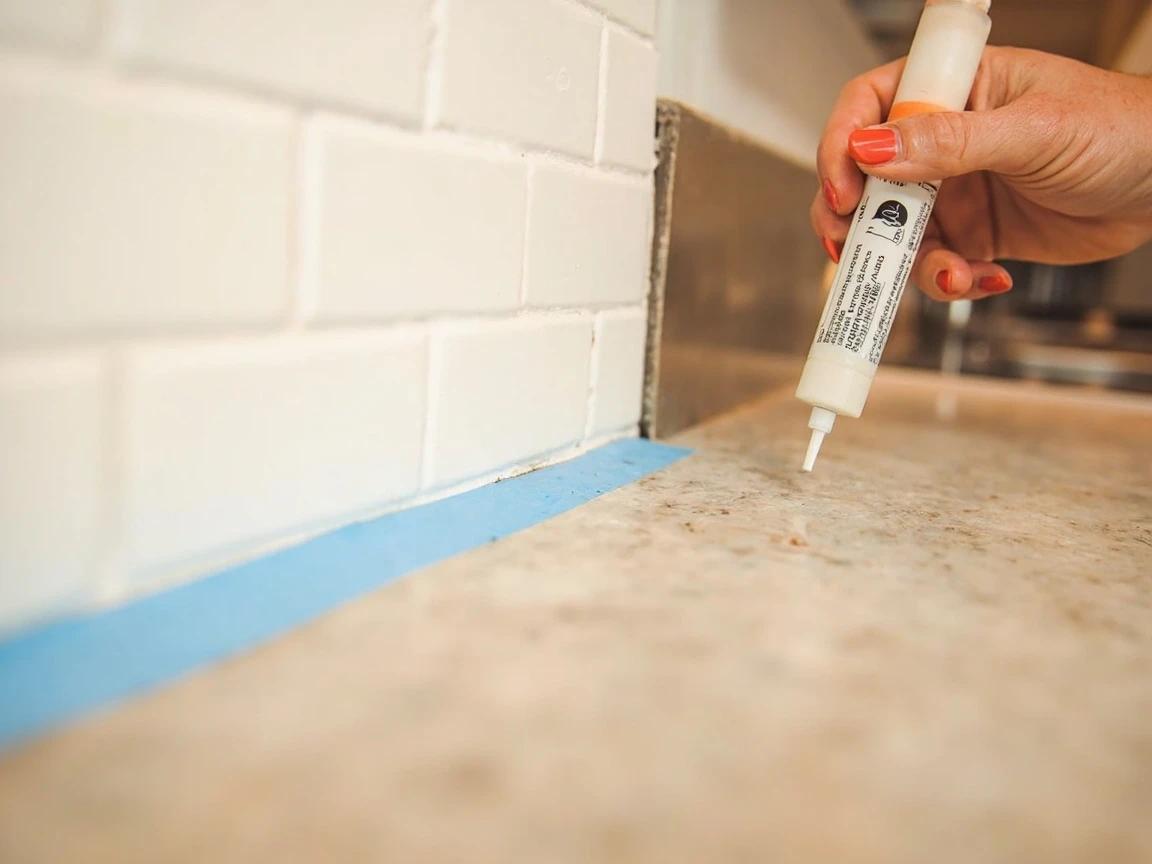
Filling the 1/8-inch counter gap with flexible caulk instead of grout is what lets the counter and wall move with the seasons without cracking the joint — skipping it is the single most common reason a backsplash develops a cracked line along the counter.
Frequently Asked Questions
Should I use mastic or thinset for a kitchen backsplash?
+
For a standard dry kitchen backsplash of ceramic or porcelain tile, premixed mastic is the easier choice — it comes ready to use, grips a vertical wall without the tile slumping, and cleans up with water. Switch to thinset mortar for anything in a wet area, for natural stone or glass tile, for large or heavy tile, and directly behind a cooktop where heat builds up. Mastic can soften with heat and won't fully cure inside a constantly damp joint.
Can you tile a backsplash over painted drywall?
+
Yes — painted drywall is a fine substrate for a dry kitchen backsplash, which is why it's the most common DIY scenario. Degrease the wall first (kitchen walls carry an invisible film of cooking grease), and lightly scuff any glossy or semi-gloss paint with 100-grit sandpaper so the adhesive can grab. Flat or primed drywall can be tiled as-is. Wet areas like a shower need cement backer board instead of drywall.
Do you have to seal grout on a backsplash?
+
If the grout is cement-based, yes — brush on a penetrating sealer after it cures (typically 48 to 72 hours) so kitchen grease and splatter can't stain the porous joints, and reseal every year or two. If you used epoxy grout or a urethane/pre-mixed grout, sealing isn't needed because those are already stain-proof. Sealer goes on the grout lines, not the tile face.
Sanded or unsanded grout — which do I need?
+
Match the grout to your joint width: use unsanded grout for joints narrower than 1/8-inch and sanded grout for joints 1/8-inch and wider. The sand particles physically support a wider joint so it doesn't shrink and crack as it dries. One caution — sanded grout can scratch soft, polished surfaces like marble or glass, so use unsanded (or a non-sanded epoxy) on delicate tile.
Can you tile over an existing tile backsplash?
+
You can, if the old tile is solidly bonded, clean, and you scuff-sand the glaze and use thinset (not mastic) for the bond — but it adds thickness that complicates outlets, edges, and the gap under the cabinets. Removing the old tile usually gives a better result. In a home built before about 1980, have the old tile and the dark adhesive behind it tested for asbestos before you remove anything.
Community Tips
💬 Sign in to share tips with the community
Sources & further reading
- How to Tile a Kitchen Backsplash — DAP
- Putting Up a Tile Backsplash: An Installation Guide — Lowe's
- How to Install a Tile Backsplash — Arizona Tile
More Carpentry Guides
View all →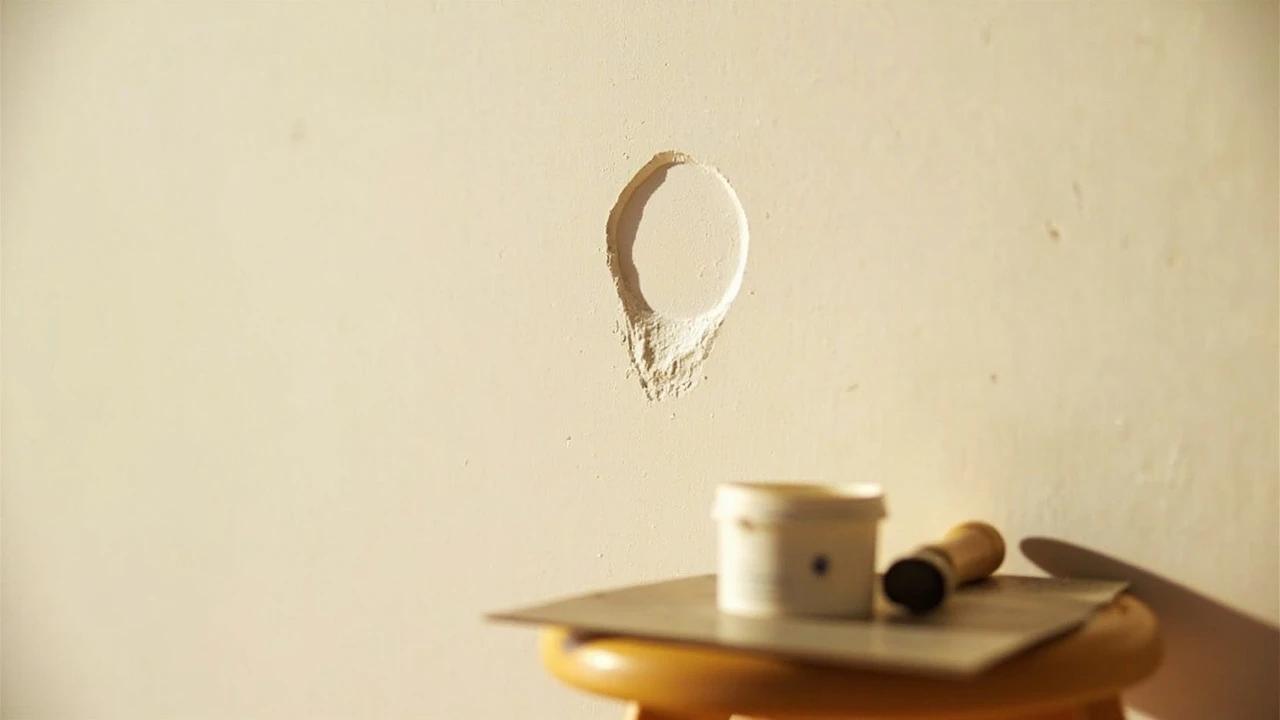 Easy45 min
How to Fix a Nail Pop or Screw Pop in Drywall
That little round bump or crescent crack in your wall is a nail pop — the framing lumber dried and shrank, and the fastener stayed put while the wood moved around it. Hammering it back in is a two-month fix; the permanent repair takes twenty minutes and about ten dollars: re-anchor the drywall with new screws above and below the pop, deal with the old fastener, and fill. This guide covers walls, the ceiling version, and how to tell a harmless pop from a symptom worth investigating.
 Medium8 hrs
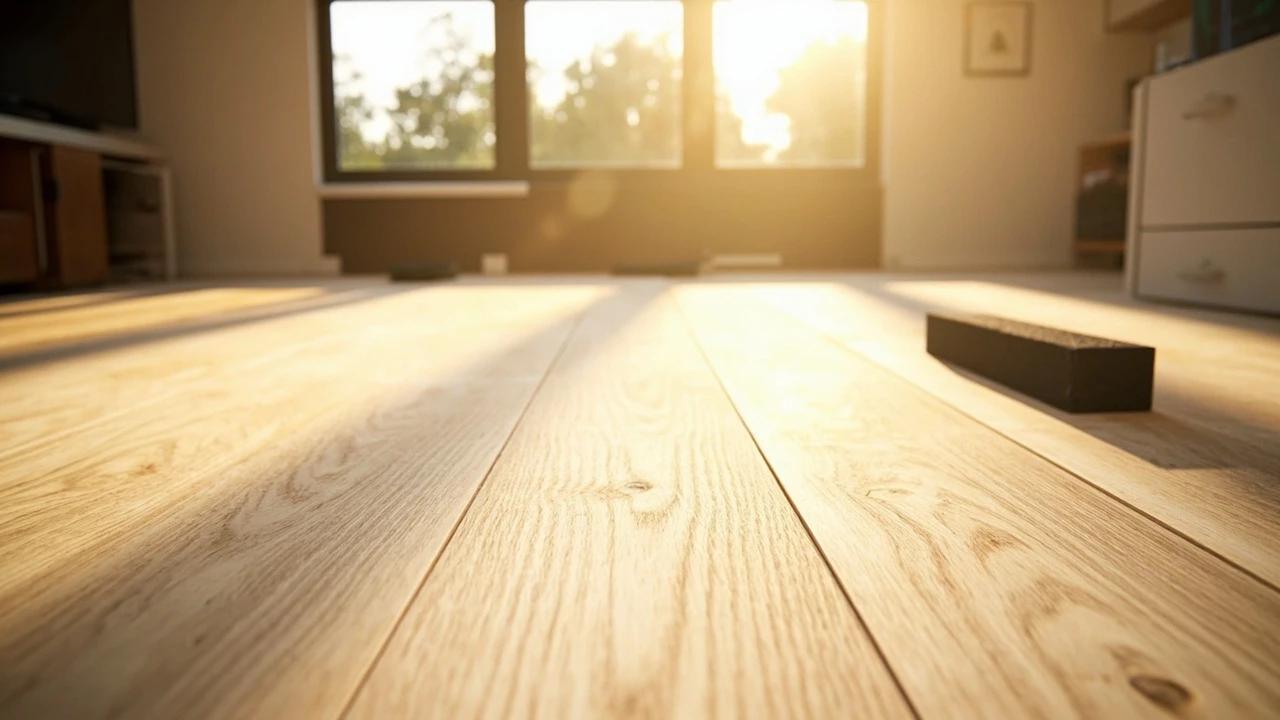
How to Install Vinyl Plank (LVP) Flooring
A floating click-lock luxury vinyl plank floor is the most beginner-friendly way to replace a tired floor — no glue, no nails, just angle-click-and-tap planks that cut with a utility knife. The catch is everything that happens before the first plank: acclimation, a dead-flat subfloor, a balanced layout, and a perimeter expansion gap. Get those right and a room takes a day and $2-7 a square foot; skip them and the floor buckles. This guide walks the whole job in order.
 Medium2 hrs
How to Patch a Large Hole in Drywall
A doorknob blowout, a wall-anchor failure, a fist through the drywall during the move-out — these holes are too big for spackle but too small to justify cutting in a full drywall section. The mesh patch (for 1/2-inch to 4-inch holes) and the California patch (for 4 to 8-inch holes) both finish flush, paint over invisibly, and cost under $25 in materials. The job takes about two hours of hands-on work spread over two or three days of compound cure time.
You Might Also Like
 Easy25 min
Best Deck Stain: Transparent vs Semi vs Solid
There is no "best" deck stain — there is the right stain for your sun exposure, wood condition, and how often you want to redo the job. Transparent stains last 1-2 years but let the natural grain show. Solid stains last 4-7 years but look like paint. This guide walks the four opacity levels and the oil-vs-water choice so you pick the one that matches your deck and your tolerance for re-staining.
 Medium30 min
How to Troubleshoot a Microwave That Won't Heat
A microwave that runs — light on, turntable spinning, timer counting down — but leaves food stone cold is one of the most common appliance failures, and about half the time the cause is something you can fix in five minutes for free. This guide walks the diagnosis from the easy stuff (demo mode, power level, a tripped GFCI, a dirty door latch) to reading the failure signature that tells you the high-voltage circuit is gone, then helps you make the repair-or-replace call with real numbers.
 Easy45 min
How to Repair a Shower Diverter Valve
When you pull the diverter knob and water still pours from the tub spout instead of the showerhead, the fix is usually a worn washer or mineral buildup — not a $200 plumber visit. This guide covers the three most common diverter types (tub spout, three-valve, and two-valve) and walks you through cleaning, replacing washers, and swapping the diverter if needed, all in under an hour with basic tools.