How to Replace an Electrical Outlet

A worn-out or discolored electrical outlet is one of the simplest electrical repairs you can tackle yourself — swapping one takes about 15-30 minutes and costs under $5 in parts versus $75-150 for an electrician visit. This guide walks you through safely replacing a standard duplex receptacle, including how to handle the wiring correctly and avoid the most common DIY mistakes.
What You'll Need
🛠 Tools
📦 Materials
Safety First
- •Always turn off power at the circuit breaker — not just the wall switch — and verify the circuit is dead with a non-contact voltage tester before touching any wires. Household 120V current can cause serious injury or death.
- •Never use a 20-amp outlet on a 15-amp circuit. The outlet amperage must match or be less than the circuit breaker rating. A mismatched outlet can overheat and start a fire.
Step-by-Step Instructions
Turn Off Power at the Breaker Panel
Go to your home's main electrical panel and flip the breaker that controls the outlet to the OFF position. If your breakers aren't labeled, plug a lamp or radio into the outlet and flip breakers one at a time until it goes off. Tape a note over the breaker so no one turns it back on while you work. Return to the outlet and use a non-contact voltage tester to confirm there is no power — hold the tester near each slot of the outlet and verify it shows no voltage.

Never skip the voltage tester step. Even after flipping the breaker, multi-wire branch circuits can keep one half of the outlet live from a different breaker.
Remove the Cover Plate and Mounting Screws
Use a flat-head screwdriver to remove the single screw holding the outlet cover plate and set the plate aside. Then remove the two Phillips-head screws (top and bottom) that secure the outlet to the electrical box. Grip the top and bottom mounting tabs of the outlet and gently pull it straight out of the box, bringing the attached wires with it. Be careful not to yank — the wires have limited slack.

Photograph and Inspect the Existing Wiring
Before disconnecting anything, take a clear photo of the wiring with your phone — this is your reference if you get confused during reconnection. Inspect the wires: you should see black (hot) wires on the brass-colored screws, white (neutral) wires on the silver-colored screws, and a bare copper or green-insulated wire on the green grounding screw. Check if wires are connected to the side screws or "back-stabbed" into holes in the back of the outlet. Note how many sets of wires are present — a middle-of-run outlet will have two sets (incoming and outgoing power).

If you find back-stabbed wires (pushed into spring-loaded holes on the back), plan to move them to the side screw terminals on the new outlet. Back-stab connections loosen over time and are the number one cause of outlet failures and arcing.
Disconnect the Wires from the Old Outlet
Loosen each side screw counterclockwise until the wire loop slips free. If the wires are back-stabbed, insert a small flat-head screwdriver into the release slot next to each wire and pull the wire out. For outlets with two sets of wires (middle-of-run), keep the pairs together so you know which are incoming and which are outgoing. Straighten any bent wire ends with needle-nose pliers and inspect the exposed copper — if a wire end is nicked, corroded, or shorter than 3/4 inch, strip back fresh insulation with wire strippers to expose a clean 3/4-inch length.

Connect the Ground Wire to the New Outlet
Start with the ground wire (bare copper or green insulated). Using needle-nose pliers, form a clockwise hook at the end of the wire — clockwise so that tightening the screw pulls the loop tighter rather than pushing it open. Hook the wire around the green grounding screw on the new outlet and tighten the screw until the wire is firmly clamped with no copper visible beyond the screw head. If the box is metal, there should also be a grounding pigtail connecting to the box itself.

Always wrap wires clockwise around screws. If you wrap counterclockwise, tightening the screw will push the wire out from under the screw head, creating a loose connection.
Connect the Neutral and Hot Wires
Connect the white (neutral) wires to the silver-colored screws on the new outlet — form a clockwise hook and tighten firmly. Then connect the black (hot) wires to the brass-colored screws the same way. If your outlet has two sets of wires (middle-of-run), connect one pair to the top screws and the other pair to the bottom screws on each side. Tug each wire gently after tightening to confirm it's secure. Wrap a single turn of electrical tape around each side of the outlet, covering the screw terminals — this prevents accidental contact with the metal box.

Reversing hot and neutral (black on silver, white on brass) creates reversed polarity — appliances will appear to work but grounding protection is defeated, creating a shock hazard. Double-check: black to brass, white to silver.
Secure the Outlet in the Electrical Box
Carefully fold the wires in an accordion pattern and push them into the back of the electrical box — don't just cram them in, as kinked wires can damage insulation. Align the outlet so the mounting tabs sit flush against the wall surface and drive the two mounting screws (top and bottom) to secure the outlet to the box. Use the long slots in the mounting tabs to adjust the outlet until it sits perfectly vertical. Snap or screw the cover plate back on — it should sit flat against the wall with no gaps.

If the outlet sits recessed or proud of the wall, add or remove box extenders (plastic spacer rings, about $0.50 each) behind the mounting tabs until the outlet face is flush with the finished wall surface.
Restore Power and Test the Outlet
Go back to the electrical panel and flip the breaker to ON. Return to the outlet and plug in a lamp or outlet tester to verify it works. If you have a three-light outlet tester ($5-10 at any hardware store), plug it in and check the light pattern — it will tell you instantly if the wiring is correct, reversed, or missing ground. Test both the top and bottom receptacle. If the outlet doesn't work, turn the breaker back off and recheck your wire connections — the most common issue is a loose screw terminal.

A three-light outlet tester is the fastest way to verify correct wiring. The light pattern chart printed on the tester tells you exactly what's wrong — reversed polarity, open ground, open neutral — so you can fix it without guessing.
Frequently Asked Questions
How long does it take to replace an electrical outlet?
+
This project typically takes about 30 min. The guide includes 8 steps with detailed instructions for each.
What tools do I need?
+
You will need: Flat-head screwdriver, Phillips-head screwdriver, Non-contact voltage tester, Needle-nose pliers, Wire strippers. Materials include: New duplex electrical outlet (15-amp for 14-gauge wire / 20-amp for 12-gauge wire — match the existing circuit), New outlet cover plate (if the old one is cracked or discolored), Electrical tape, Wire nuts (if existing connections need re-making).
Is this a good project for beginners?
+
Yes! This is rated as an easy project that most homeowners can complete with basic tools and no prior experience.
Community Tips
💬 Sign in to share tips with the community
Sources & further reading
- Home Electrical Safety — Electrical Safety Foundation International
- Home Fire & Electrical Safety — National Fire Protection Association
More Electrical Guides
View all → Easy45 min
How to Install a Smart Lock on an Exterior Door
A smart lock is the rare upgrade that's both safer and more convenient — keypad or phone entry, no spare key under the mat, and a log of who came and went — and on a standard pre-bored door it's a 45-minute swap with a single screwdriver, no electrician needed. The catch isn't wiring (there usually isn't any); it's buying a lock that actually fits your door and getting the bolt to line up so it never jams. This guide covers the compatibility check that prevents a costly return, the install itself, and the alignment and app setup that make it reliable.
 Medium1h 30m
How to Install a Motion Sensor Light
A motion-activated floodlight is one of the most effective and affordable security upgrades you can make — it deters intruders, lights your path when you come home after dark, and typically costs under $40 for the fixture itself. If you're replacing an existing outdoor light, the wiring is already in place and the swap takes about 90 minutes with basic hand tools. This guide covers turning off power safely, removing the old fixture, wiring the new sensor light, mounting it, and dialing in the sensitivity and aim so it covers exactly the zone you want.
 Medium3 hrs
How to Install Outdoor Landscape Lighting
Low-voltage landscape lighting transforms a yard after dark — highlighting walkways, trees, and architectural features while adding real security value — and it's one of the most approachable electrical projects a homeowner can tackle because the entire system runs on safe 12-volt power. A typical 8-to-10 fixture installation costs $150-300 in materials and takes an afternoon. This guide walks you through planning the layout, sizing the transformer, running burial-rated wire, connecting fixtures, and testing for voltage drop before you bury everything.
You Might Also Like
 Easy25 min
Best Deck Stain: Transparent vs Semi vs Solid
There is no "best" deck stain — there is the right stain for your sun exposure, wood condition, and how often you want to redo the job. Transparent stains last 1-2 years but let the natural grain show. Solid stains last 4-7 years but look like paint. This guide walks the four opacity levels and the oil-vs-water choice so you pick the one that matches your deck and your tolerance for re-staining.
 Easy1h 30m
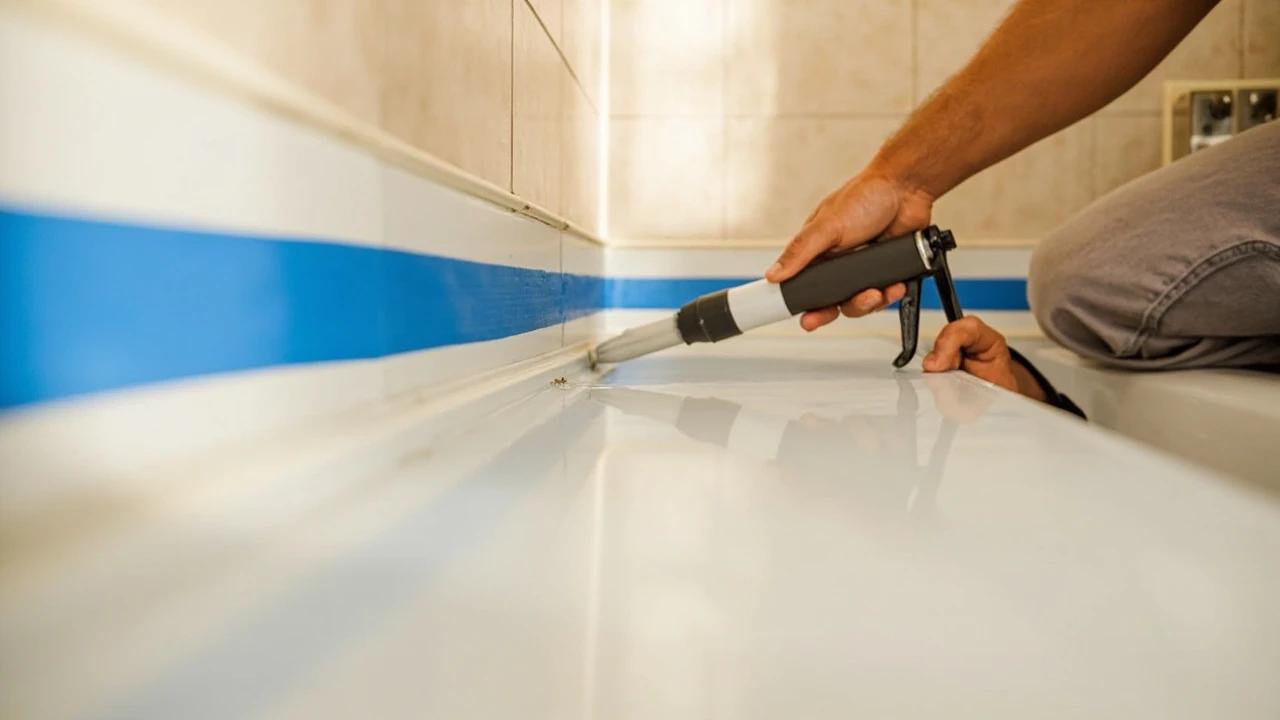
How to Re-Caulk a Bathtub or Shower Surround
Mildewed, cracked, or peeling caulk around a bathtub isn't just ugly — it's letting water reach the drywall and studs behind the wall, which turns a $10 caulk job into a thousand-dollar tile-and-framing repair. This guide walks through removing the old caulk completely, treating mold, masking and tooling a clean single bead of 100% silicone, and the curing schedule that keeps the new joint waterproof for years.
 Easy25 min
How to Clean a Refrigerator Condenser Coil
Dirty condenser coils are the number-one cause of refrigerator inefficiency — they force the compressor to run longer and harder, driving up your electricity bill by 10-25% and shortening the appliance's lifespan. Cleaning them takes about 20 minutes with a brush and vacuum, and the improvement in cooling performance is immediate. This guide covers locating coils on both bottom-mount and rear-mount models, safe cleaning technique, and a maintenance schedule to keep your fridge running at peak efficiency.