How to Clean and Maintain a Mini-Split

A ductless mini-split is the lowest-maintenance heating and cooling there is — right up until the filters mat over, the coil grows a musty film, and the drain line clogs and drips water down your wall. Twenty minutes of cleaning every few weeks during cooling season, plus one deeper pass each spring, keeps the air clean, the efficiency you paid for, and the mold out. This guide covers the whole routine for about $0-30 in supplies, and is honest about the two jobs (refrigerant and a moldy blower wheel) that belong to a pro.
What You'll Need
🛠 Tools
📦 Materials
Safety First
- •Turn the system off at the remote, then cut power at the breaker or the outdoor disconnect before opening any panel. The indoor blower can start on its own in some modes, and the electronics behind the cover are live otherwise.
- •Never use a pressure washer, stiff brush, or harsh household chemicals (bleach, degreaser, all-purpose spray) on the indoor coil or outdoor fins — the aluminum fins bend and corrode easily, and only HVAC-specific coil cleaner is formulated to be safe on them.
- •Most indoor heads sit 6-7 feet up the wall: use a stable stepladder, not a chair, and keep three points of contact while working overhead.
- •Coil and condenser fins are thin sharp aluminum — wear gloves when cleaning or combing them.
Step-by-Step Instructions
Learn the Warning Signs of a Dirty Mini-Split
Mini-splits fail quietly before they fail loudly. Weak or wheezy airflow, a musty smell when the unit kicks on, water dripping from the bottom of the indoor head, ice on the coil or refrigerant lines, and a creeping electric bill are all the same story: dust and biofilm choking the filters, coil, or drain. Catch any of these and the routine below usually fixes it; ignore them through a cooling season and you're into mold, water damage, and service calls.
Turn It Off at the Remote, Then Kill the Power
Switch the system off with the remote and wait a minute for the vanes to close, then cut power for real: flip the dedicated breaker in your panel, or pull the handle on the small outdoor disconnect box mounted on the wall next to the outdoor unit. The blower can start on its own in some auto modes, and the boards behind the front panel stay live until power is cut. Lay a towel or plastic on the floor and furniture below the head before opening anything.
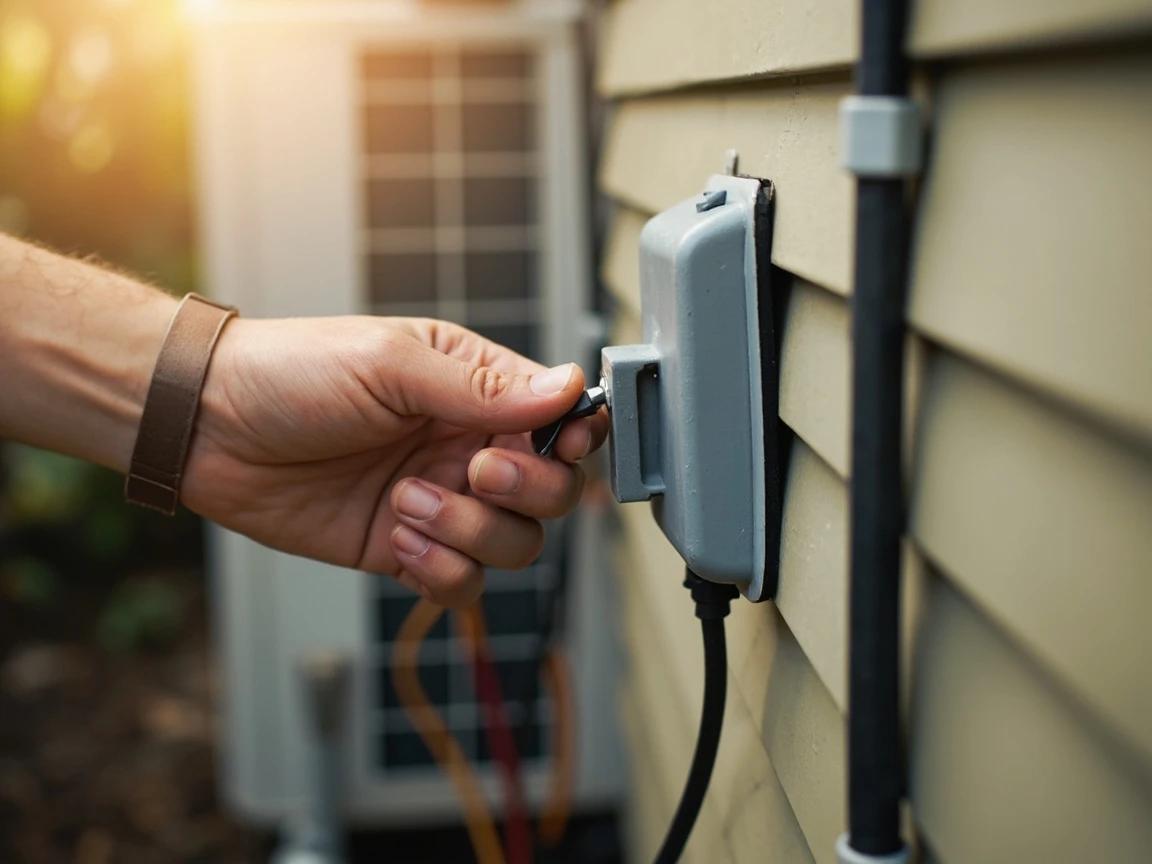
Cutting power at the remote alone is not enough — the unit's electronics and capacitor stay energized. Breaker or disconnect off before any panel comes open.
Wash the Mesh Filters (the Every-Few-Weeks Job)
Lift the front panel up from the bottom corners until it props open, and slide out the two thin mesh filters. Vacuum the loose dust, then wash them in warm water with a drop of dish soap, rinsing from the clean side so debris backs out the way it came in. Shake off and air-dry completely — reinstalling damp filters feeds the mold you're trying to prevent. During heavy summer or winter use this is a every-2-to-4-weeks habit; it takes five minutes once you've done it twice.
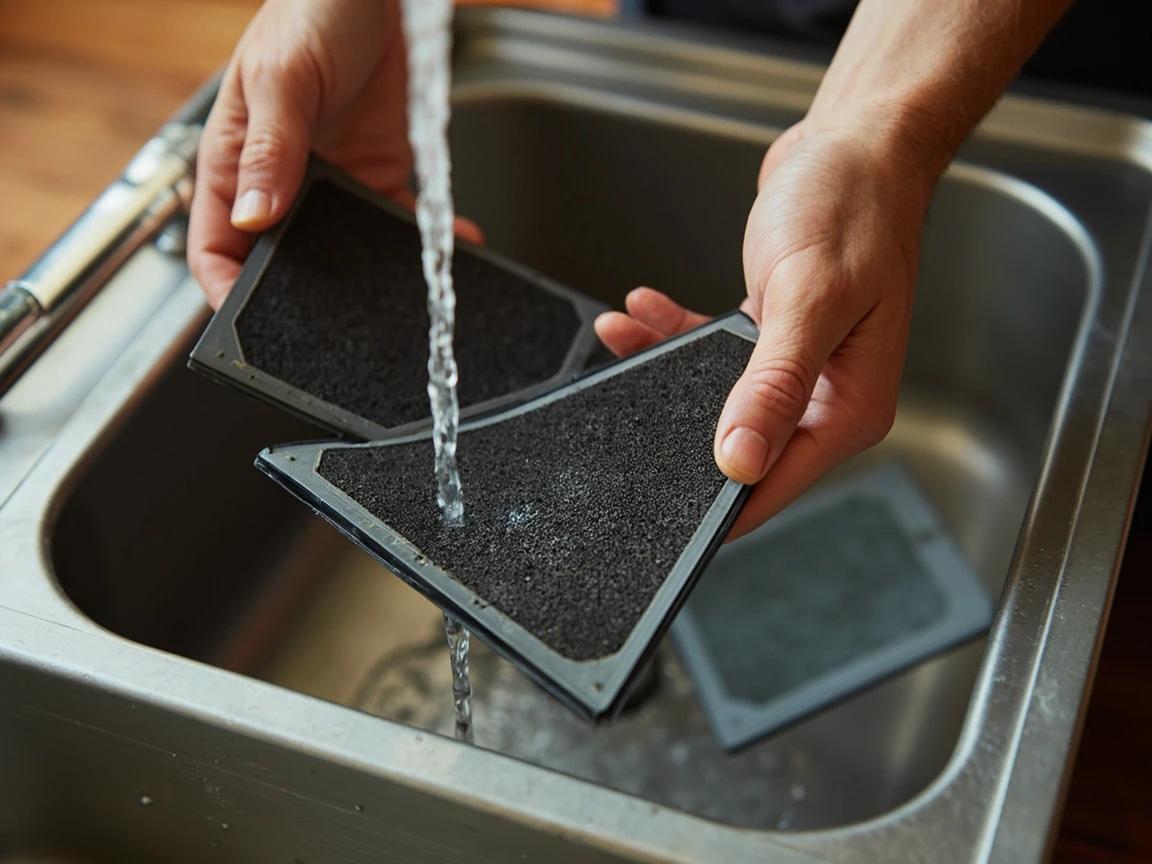
Set a recurring phone reminder for filter day during cooling season, the same habit as your home's main HVAC filter. Clean filters are 80% of mini-split maintenance.
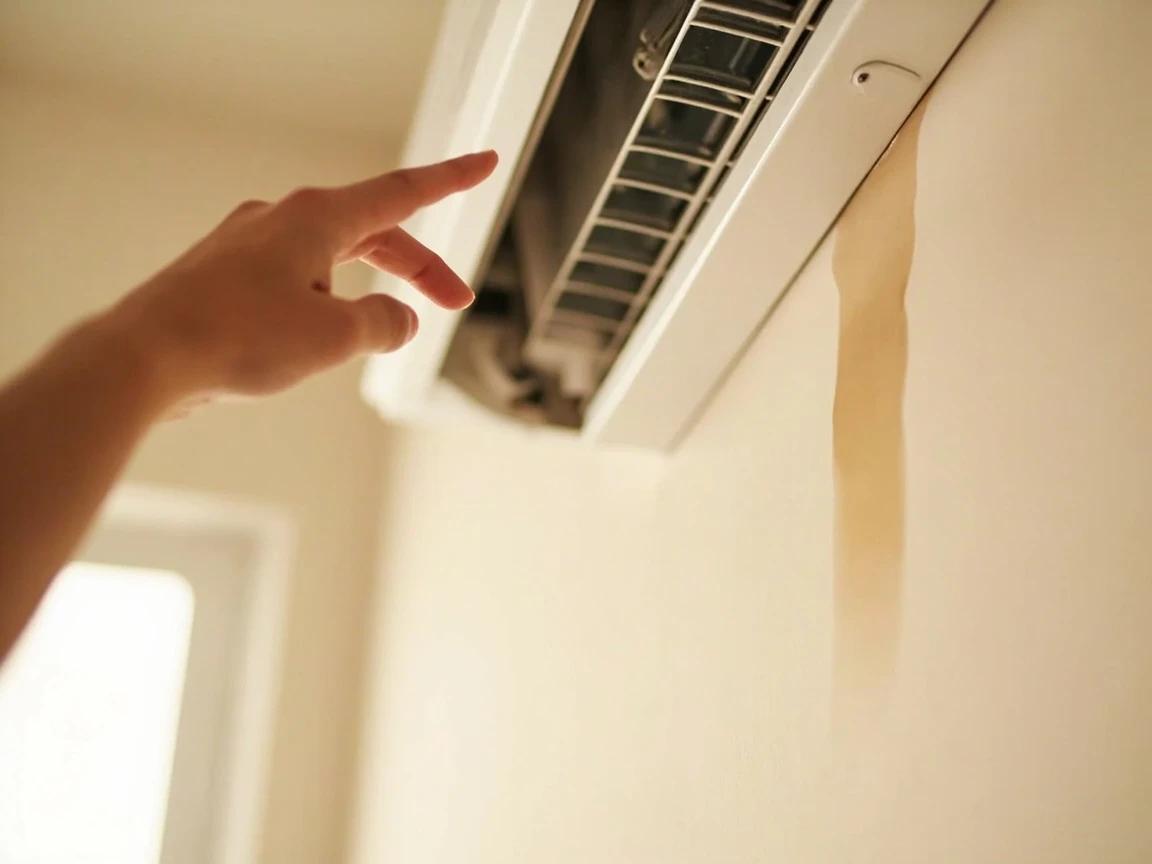
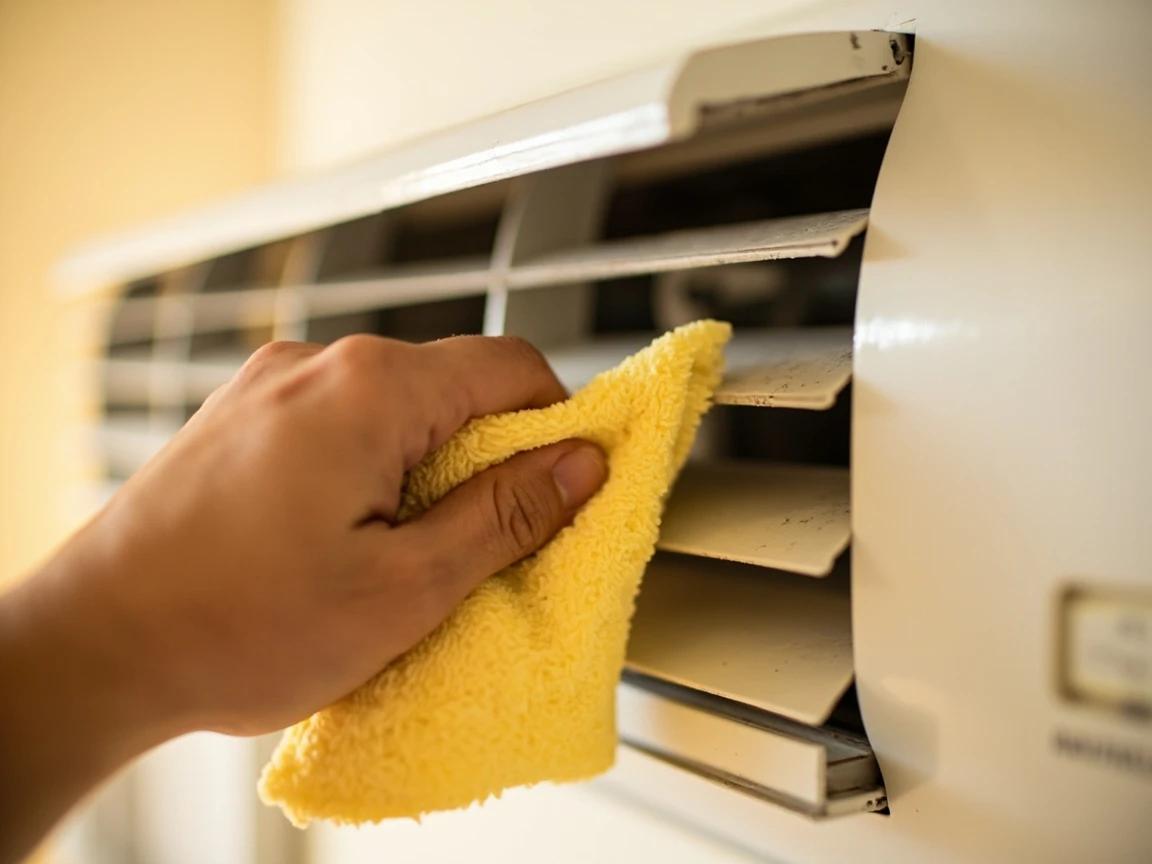
Wipe Down the Shell, Vanes, and Intake
With the filters out, wipe the unit's shell, the top intake grille, and both sides of the louver vanes with a barely damp microfiber cloth, then dry. Dust on the vanes gets blown across the room every time the unit runs, and a grimy intake restricts airflow just like a dirty filter. Work gently around the vanes — they're driven by small plastic motors that don't appreciate being forced past their travel.
Clean the Evaporator Coil With No-Rinse Cleaner
Behind where the filters sat, you'll see the evaporator coil — rows of thin aluminum fins. Brush off loose dust with a soft-bristle brush or vacuum brush attachment, stroking with the fins, never across them. Then coat the coil with a no-rinse HVAC evaporator coil cleaner: the foam dissolves the grime film and rinses itself away with the coil's own condensation the next time the system runs in cooling mode. This once-a-season step is what keeps the musty smell from ever starting.
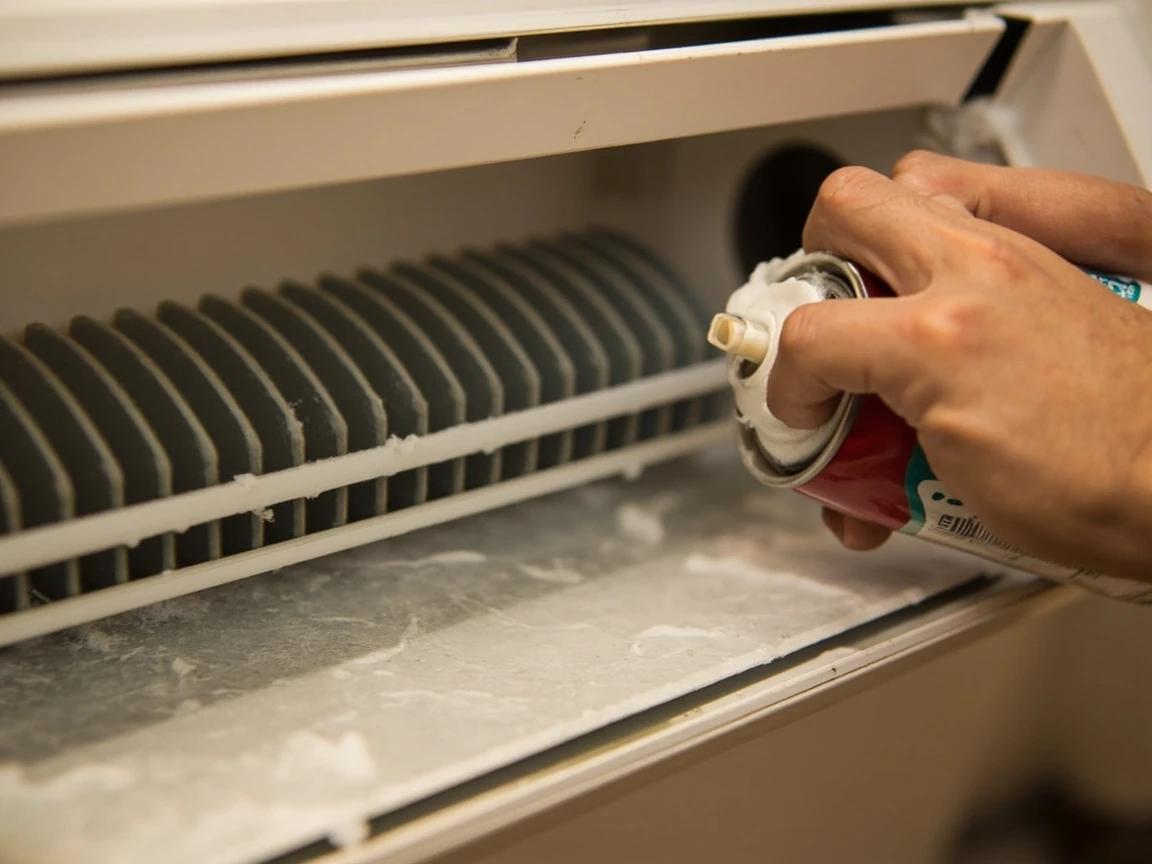
Use only cleaner labeled for indoor evaporator coils — no-rinse, fin-safe. Bleach, degreasers, and all-purpose sprays corrode the fins and copper, and anything needing a heavy rinse doesn't belong inside a wall-mounted head full of electronics.
Flush the Condensate Drain Line
Cooling season sends gallons of condensate down a small drain hose that runs from the unit's drip pan out through the wall — and algae slime in that line is the number-one reason mini-splits drip water inside. Find the drain outlet outside (a small open-ended tube near the lineset, usually dribbling on humid days), seal your wet/dry vacuum hose around it with a rag, and run it for a minute to pull the clog through. Then slowly pour a cup of water (or half water, half white vinegar) into the drain pan at the indoor unit and confirm it appears outside.
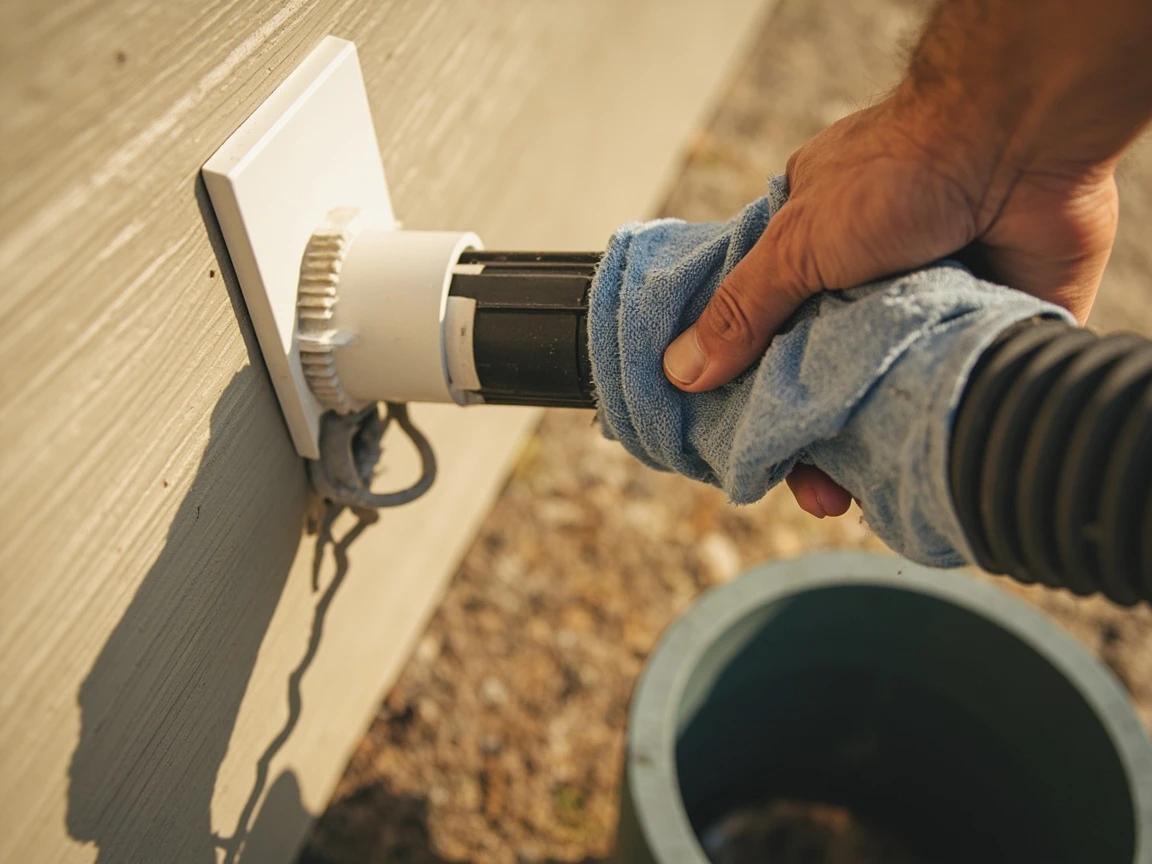
Do this flush at the start of every cooling season, before the drips start. If your system has a condensate pump (you hear a small motor cycle when it drains), a pump that stops working is a technician part, not a flush.
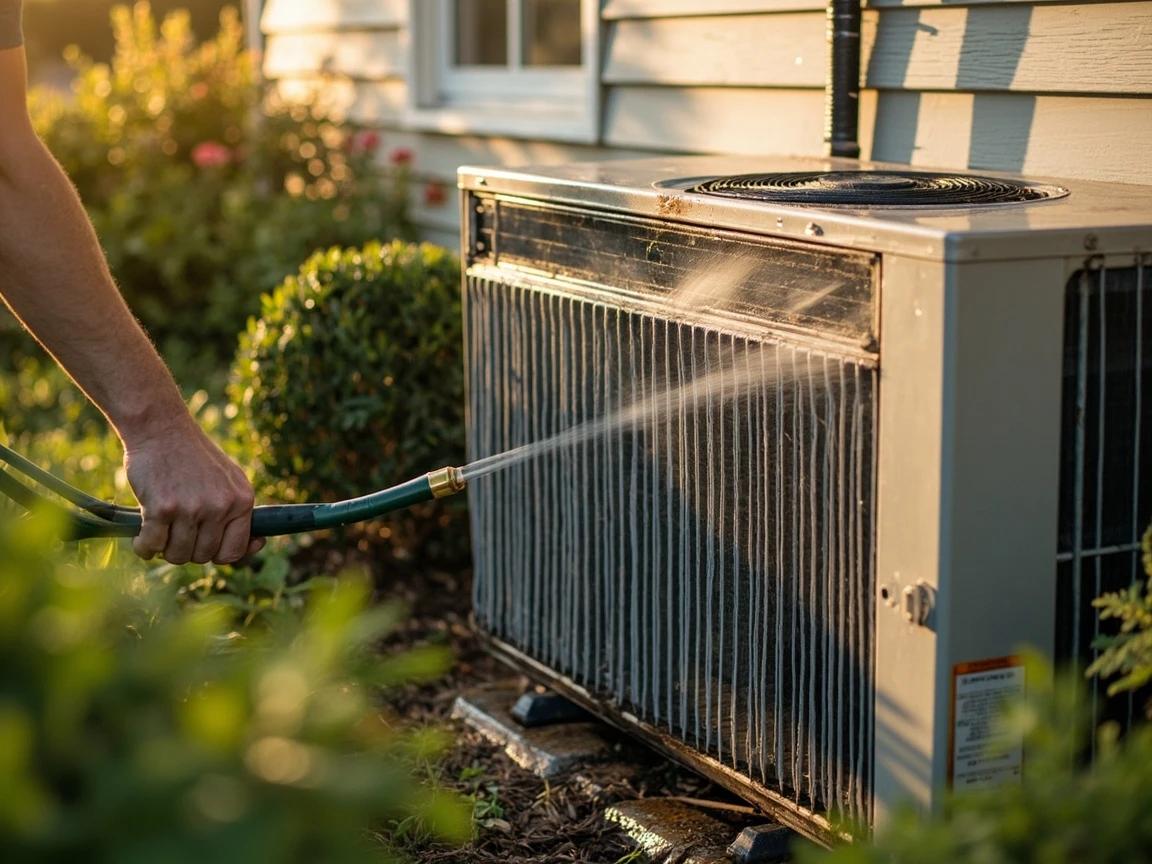
Clear and Gently Rinse the Outdoor Unit
The outdoor condenser needs breathing room and clean fins. Pull weeds, leaves, and anything stacked within about 12 inches of its back and 2 feet of its sides and front, and trim plantings above it. Then rinse the fins with a garden hose on a gentle fan spray, washing top-down — never a pressure washer, which folds the fins flat. If a patch of fins is already crushed (hail, a bumped trash can), straighten them with a fin comb matched to the fin spacing, working slowly.
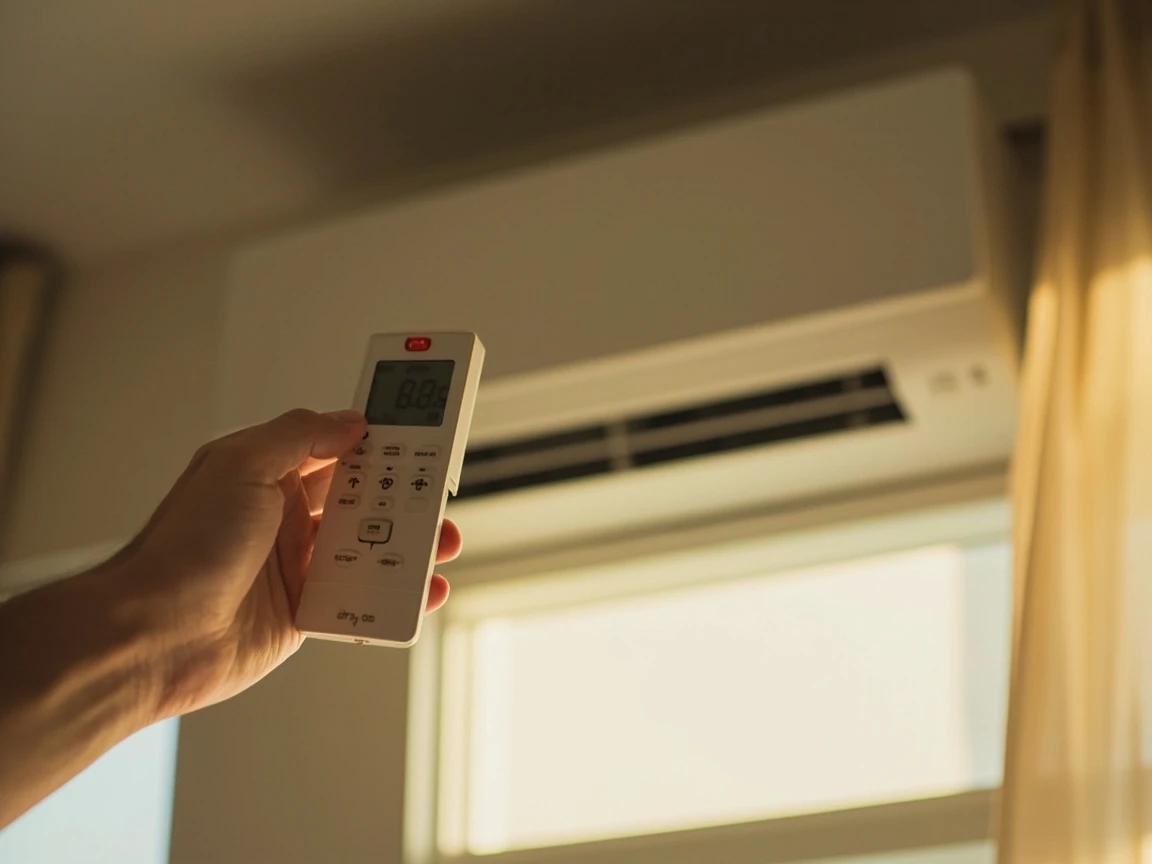
Restore Power and Run a Test Cycle
Close the front panel, restore the breaker or disconnect, and run the system through its paces: cooling mode for ten minutes, then (on heat pumps) a few minutes of heat. You're looking for strong, quiet airflow, cold air within a minute or two, no new rattles, and no blinking lights on the head — a flashing LED pattern is an error code you can decode in the manual. Glance at the outdoor drain stub during cooling: steady dripping there means the condensate path is doing its job.
Put the Routine on a Calendar — and Book the Annual Pro Visit
The cadence that keeps a mini-split healthy: filters every 2-4 weeks in heavy use, a coil treatment and drain flush at the start of each cooling season, an outdoor rinse and clearance check in spring and fall. Then book a professional tune-up once a year ($150-300 for a single zone): the tech checks refrigerant charge and electrical connections, tests the condensate pump if you have one, and can deep-clean the blower wheel — the jobs that DIY cleaning can't reach and that manufacturer warranties quietly expect.

Schedule the pro visit in early spring before the first heat wave — HVAC calendars jam solid the week temperatures spike, and shoulder-season appointments are easier to get and sometimes cheaper.
Frequently Asked Questions
How often should I clean my mini-split filters?
+
Every 2 to 4 weeks during heavy cooling or heating use — the washable mesh filters load up fast because the unit recirculates the same room air constantly. Homes with shedding pets, smokers, or dusty conditions sit at the 2-week end. Letting them mat over is the single biggest cause of weak airflow, higher bills, and the coil icing up.
Why does my mini-split smell musty when it runs?
+
A musty, dirty-sock smell means mold or mildew is growing inside the unit — the coil and blower stay damp in cooling mode, and dust from neglected filters feeds the growth. Wash the filters, clean the coil with a no-rinse HVAC coil cleaner, and flush the condensate drain. If the smell survives that cleaning, the mold is on the blower wheel itself, which needs a professional bib-kit deep clean.
Why is my mini-split dripping water inside?
+
Nine times out of ten the condensate drain line is clogged with algae and slime, so the drain pan overflows and water runs down the wall. Find where the small drain hose exits outside, pull the clog through with a wet/dry vacuum sealed to the end, and pour a cup of water (or a vinegar-water mix) through the pan to confirm flow. Less common causes are a cracked drain pan or, on pumped systems, a failed condensate pump.
Why is there ice on my mini-split coil?
+
Ice almost always means starved airflow: filters or a coil so dirty the unit can't absorb heat, so the coil drops below freezing. Switch to fan-only mode to thaw it, then clean the filters and coil. If ice returns after a thorough cleaning, the likely cause is low refrigerant from a leak — that diagnosis and recharge is EPA-certified technician work, not DIY.
How much does professional mini-split service cost, and is it worth it?
+
A typical annual tune-up runs $150-300 for a single-zone system (more per additional indoor head) and covers what DIY cleaning can't: refrigerant pressure checks, electrical inspection, condensate pump testing, and a deep clean of the blower wheel and coil. Yearly service protects efficiency and most manufacturers' warranty terms — skipping it for several seasons is how a $200 visit becomes an $800 repair.
Community Tips
💬 Sign in to share tips with the community
Sources & further reading
More HVAC Guides
View all → Medium3 hrs
How to Balance Uneven Room Temperatures
If your bedroom runs 8 degrees colder than the living room or the upstairs cooks while the basement freezes, you can fix most of it in an afternoon without calling a pro. This guide walks you through diagnosing the problem, adjusting vents and trunk dampers, sealing duct leaks, and rebalancing airflow — the same process an HVAC tech would charge $750–$2,000 for.
 Easy45 min
How to Program a Smart Thermostat
A properly programmed smart thermostat can cut your heating and cooling bills by 8-10% — roughly $50-150 per year — without sacrificing comfort. Most homeowners never get past the default settings, leaving serious savings on the table. This guide walks you through the full setup: Wi-Fi connection, schedule creation, and energy-saving features like geofencing and eco mode.
 Medium2 hrs
How to Clean Air Ducts Yourself
Dust, pet dander, and debris build up inside your ductwork over time, and cleaning the accessible sections near each register cuts down on dust that gets stirred back into rooms. The EPA does not recommend routine, calendar-based duct cleaning — clean when you can actually see buildup at the vents, not on a fixed schedule. Professional duct cleaning runs $300-500, but you can tackle the accessible sections yourself in about two hours with a vacuum, a brush, and a screwdriver. This guide walks you through removing vents, loosening buildup, vacuuming debris, and replacing your filter so your system runs cleaner and your air feels fresher.
You Might Also Like
 Easy45 min
How to Repair a Shower Diverter Valve
When you pull the diverter knob and water still pours from the tub spout instead of the showerhead, the fix is usually a worn washer or mineral buildup — not a $200 plumber visit. This guide covers the three most common diverter types (tub spout, three-valve, and two-valve) and walks you through cleaning, replacing washers, and swapping the diverter if needed, all in under an hour with basic tools.
 Easy25 min
How to Clean a Refrigerator Condenser Coil
Dirty condenser coils are the number-one cause of refrigerator inefficiency — they force the compressor to run longer and harder, driving up your electricity bill by 10-25% and shortening the appliance's lifespan. Cleaning them takes about 20 minutes with a brush and vacuum, and the improvement in cooling performance is immediate. This guide covers locating coils on both bottom-mount and rear-mount models, safe cleaning technique, and a maintenance schedule to keep your fridge running at peak efficiency.
 Easy15 min
How to Replace a Refrigerator Water Filter
A clogged refrigerator water filter is the most common cause of slow dispensing, off-tasting water, and undersized ice cubes — and it is the easiest fix in your kitchen. Most filters are designed to be swapped in under five minutes with no tools, no shut-off valve, and no spilled water. This guide covers locating your filter, the two common removal styles (twist-in and push-in), inspecting the O-rings, flushing the new filter, and resetting the indicator light so you do not see the red "Replace" warning the next morning.