How to Install a Bathroom Exhaust Fan

Replacing a loud, underpowered bathroom fan with a modern quiet model is one of the highest-impact upgrades you can make for under $150 — it kills mold-causing moisture, clears steam in a minute, and runs whisper-quiet while it does it. This guide walks you through a like-for-like replacement in an afternoon, covering CFM sizing, wiring, and ductwork so you end up with a fan that actually does its job.
What You'll Need
🛠 Tools
📦 Materials
Safety First
- •Always shut off power at the breaker and verify with a non-contact voltage tester before touching any wires — the fan's switch leg can still be live even when the fan is off.
- •Old fan housings often contain years of lint and dust — wear a respirator and goggles when you pull the grille, because disturbed debris rains straight down into your face.
- •Never vent the exhaust into an attic, soffit, crawl space, or between joists — trapped moisture causes mold, rot, and ceiling stains within a single season.
Step-by-Step Instructions
Size the Fan for Your Bathroom
Measure the length and width of the bathroom and multiply to get square footage. The standard rule is 1 CFM per square foot, so a 7×10 bathroom needs a 70 CFM fan — round up to the nearest common size (50, 70, 80, 90, or 110 CFM). For whirlpool or jetted tubs add another 100 CFM. While you're shopping, look for a sone rating of 1.0 or lower for bedrooms and master baths — anything louder is miserable to listen to twice a day.
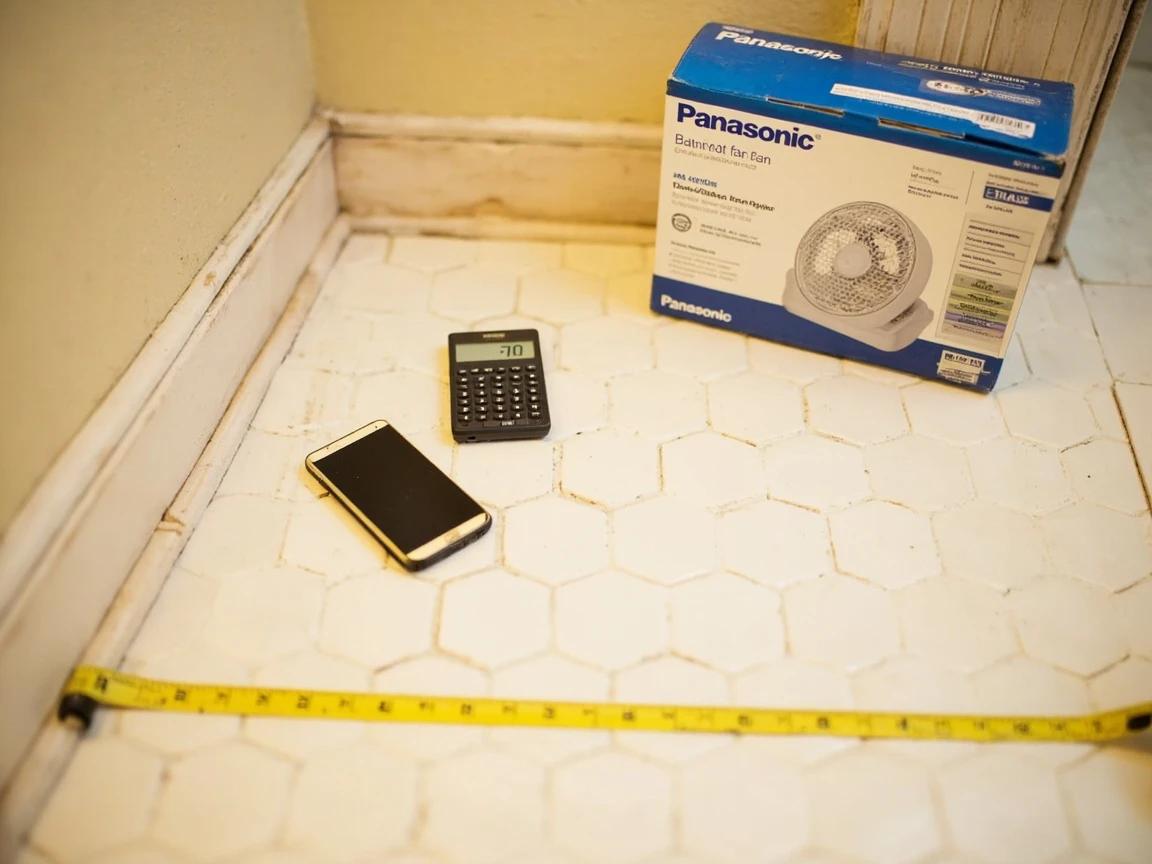
Check the existing housing's rough-opening dimensions before you buy a new fan — matching the hole size saves you from patching and re-cutting drywall.
Shut Off Power and Verify
Flip the breaker that feeds the bathroom fan switch at your main electrical panel and turn the fan and lights on in the bathroom to confirm they're dead. Climb the ladder with a non-contact voltage tester, pop the grille off the old fan, and hold the tester against every wire inside the housing — it should stay silent. Only then do you touch anything.
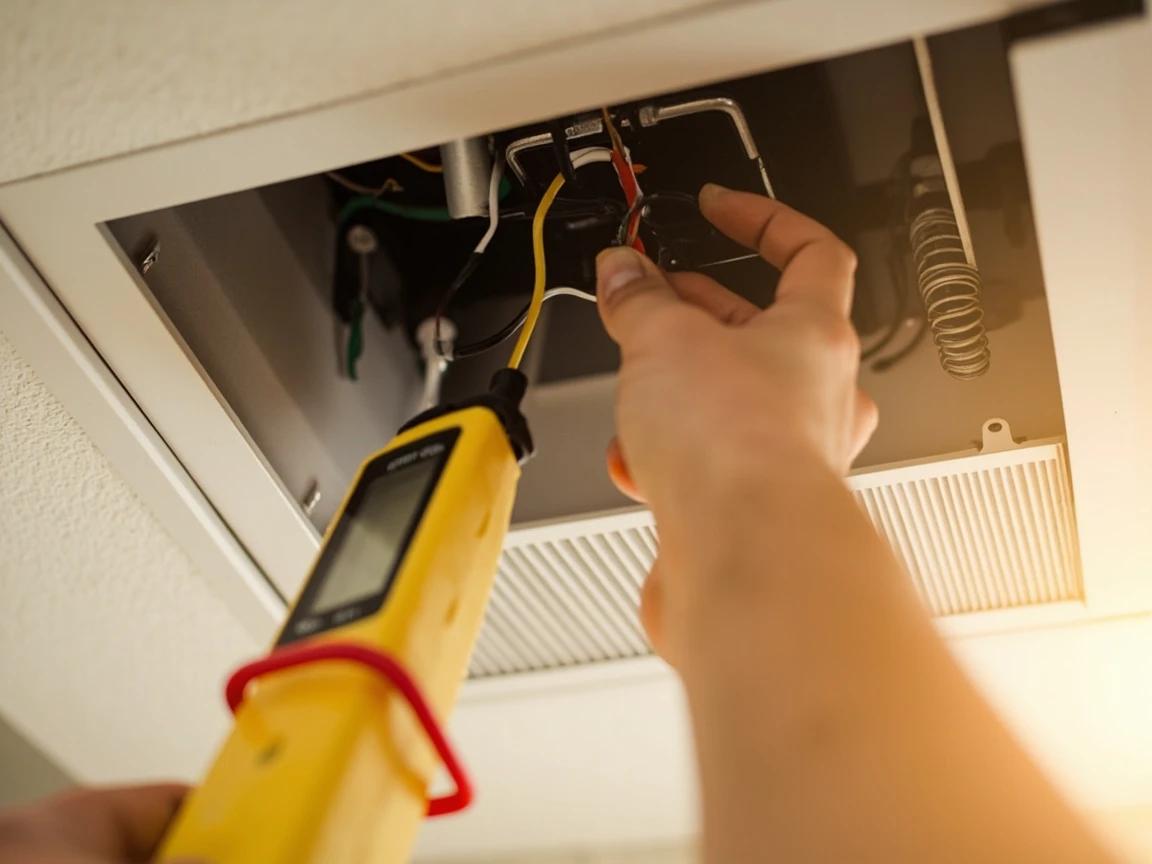
The switch leg can remain energized even when the fan is off — never skip the voltage test, and tape a note over the breaker so nobody flips it back while you're working.
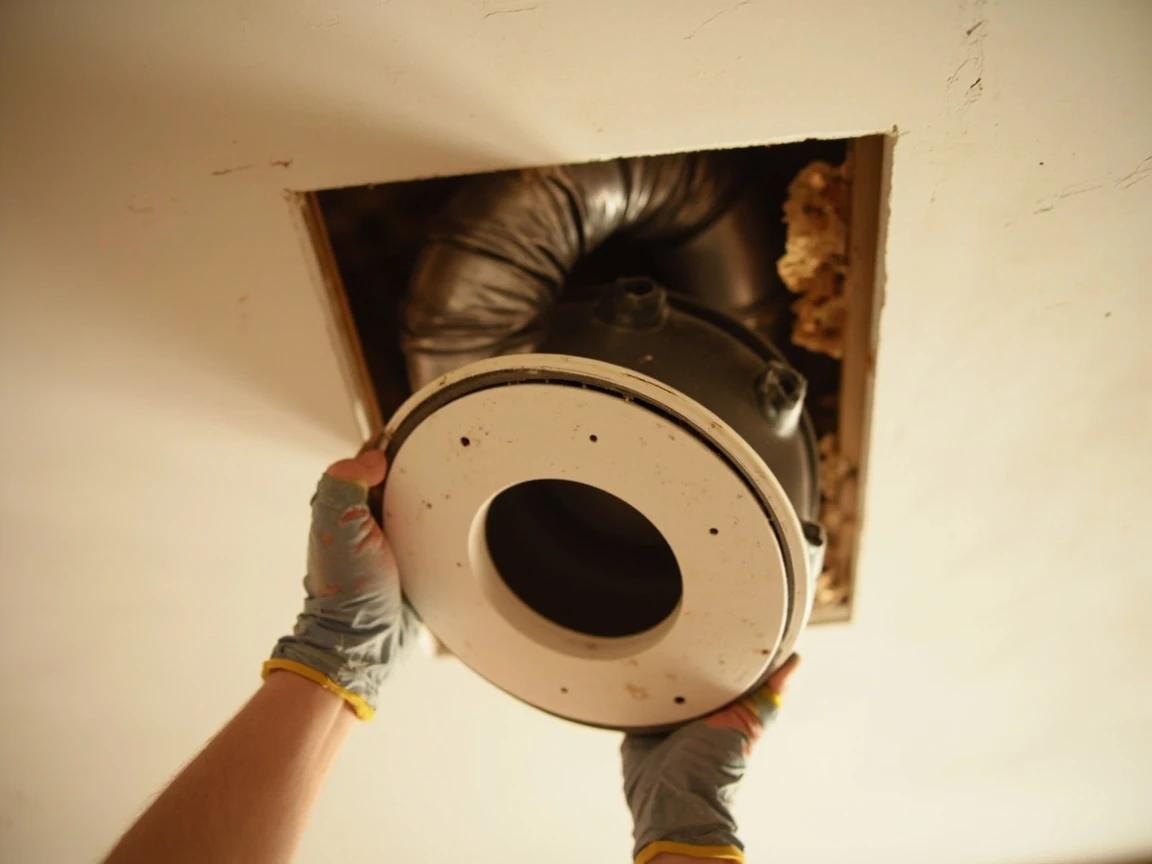
Remove the Old Fan
Unplug the motor from the integrated outlet in the housing (most modern fans plug right in) or unscrew the wire-nut connections if it's direct-wired, noting which color went where. Slide out the motor assembly, then disconnect the flexible duct from the exhaust port and pull the Romex out of the internal clamp. Finally, unscrew the housing from the ceiling joist it's fastened to and lower the whole box out of the hole.
Check the Ceiling Opening
Test-fit the new housing in the existing hole. If it drops in with a little slack, you're golden. If the hole is too small, trace the new housing footprint on the ceiling and enlarge the opening with a drywall saw, cutting just shy of the line and filing to fit. If the hole is too big, screw a scrap of drywall to the joist above to shrink the opening — you can always mud and paint later.
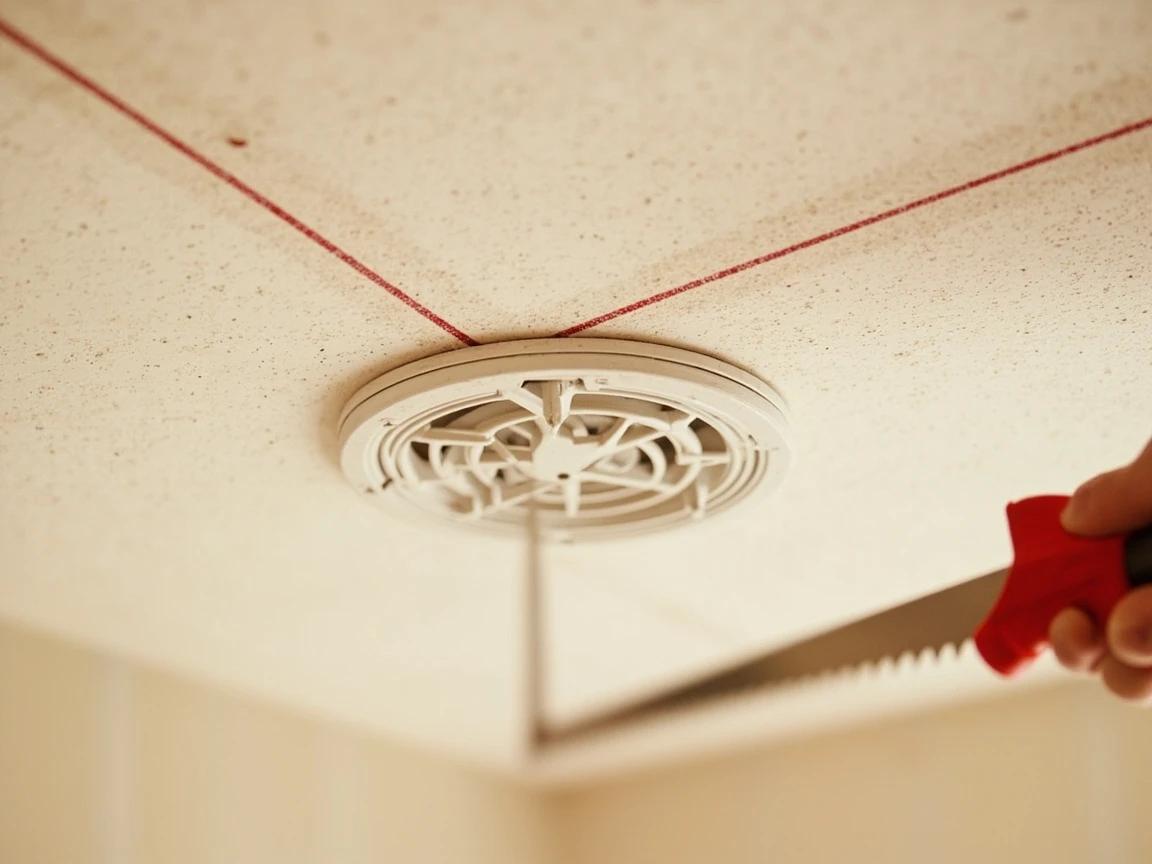
Spread an old bedsheet on the floor below before you cut — drywall dust gets into every tile grout line and is a nightmare to mop out.
Connect the Duct
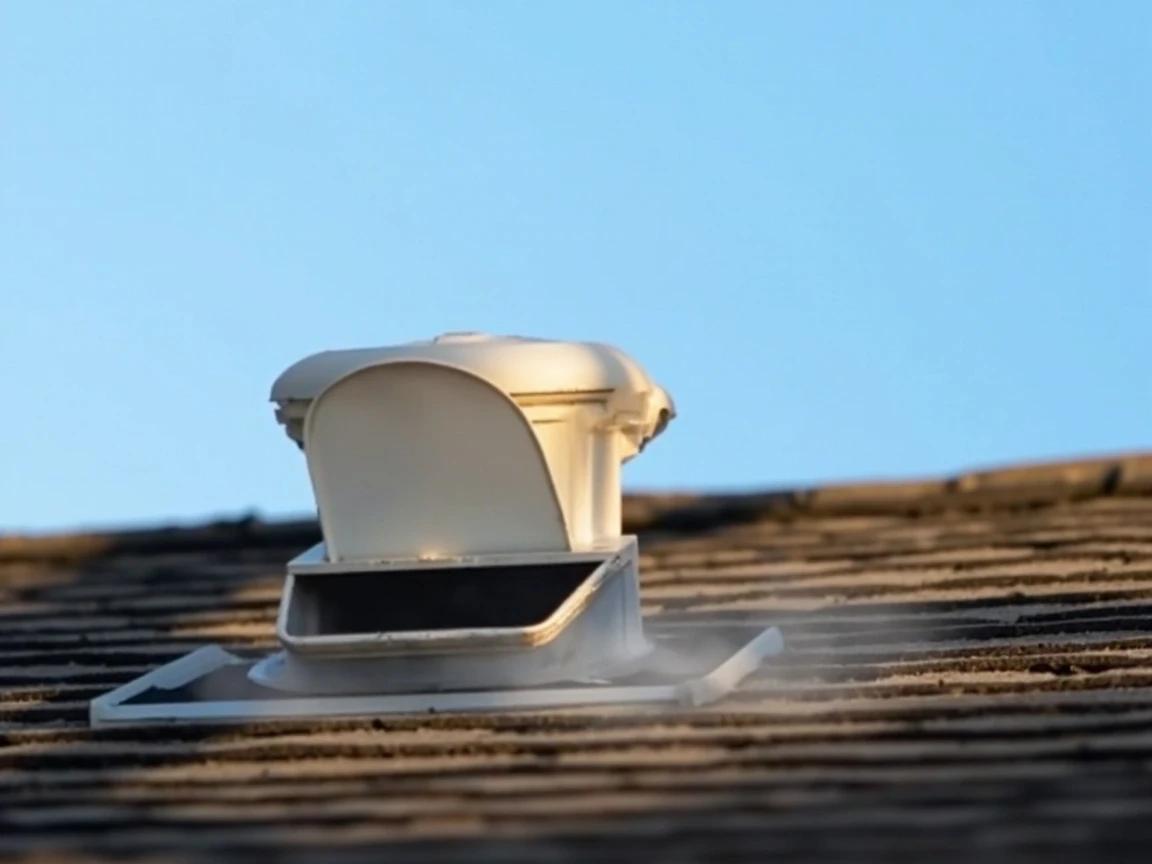
From above (in the attic if you have access) or by working through the ceiling hole, slip the flexible or rigid duct over the new fan's exhaust collar. Secure it with a hose clamp, then wrap the joint tightly with UL 181 foil HVAC tape — not cloth duct tape, which fails within a year. A zip tie alone is not a code-compliant seal; you can use a zip tie temporarily to hold the duct in place while you tape, but the finished joint must be foil-taped. If you're running new duct, use rigid 4-inch metal pipe and keep the run as short and straight as possible; every 90° elbow cuts airflow by 30%.
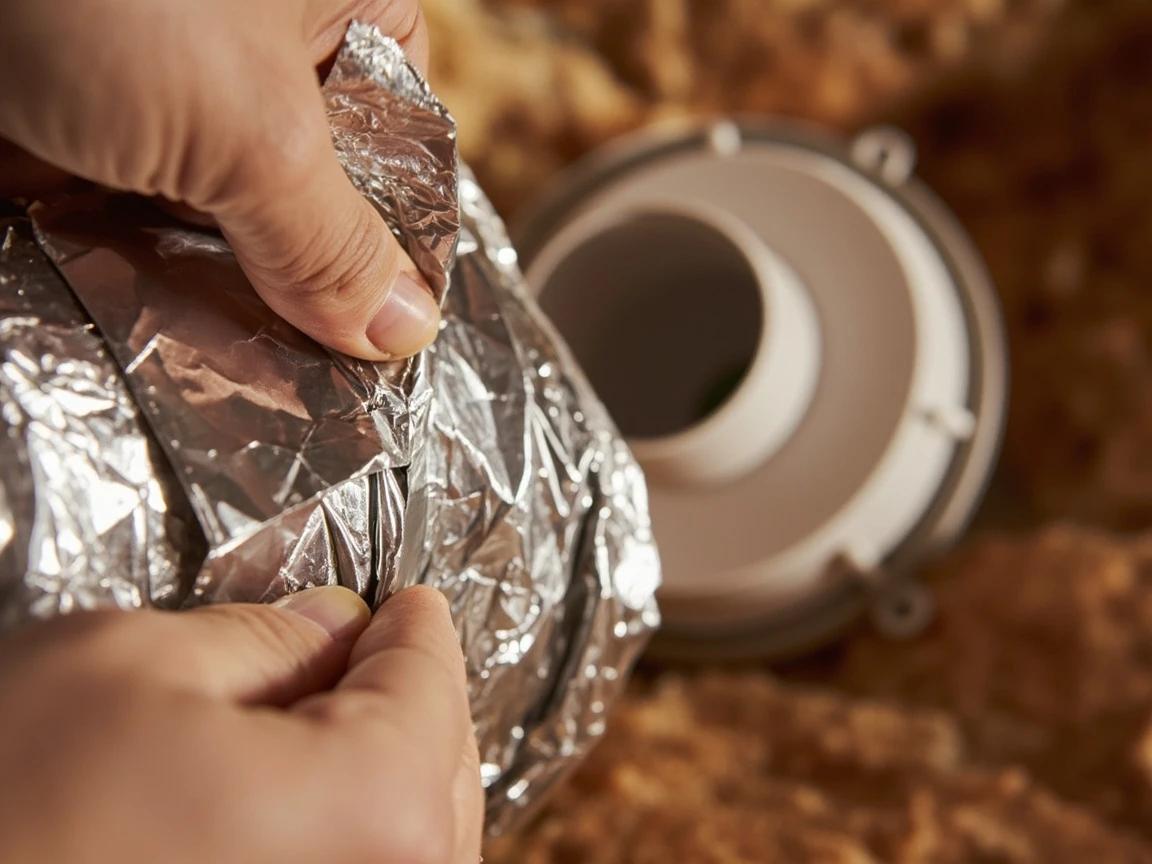
Never terminate the duct in the attic or soffit — always run it to a roof cap or gable vent with a damper, and keep the termination at least 3 feet from any window or door.
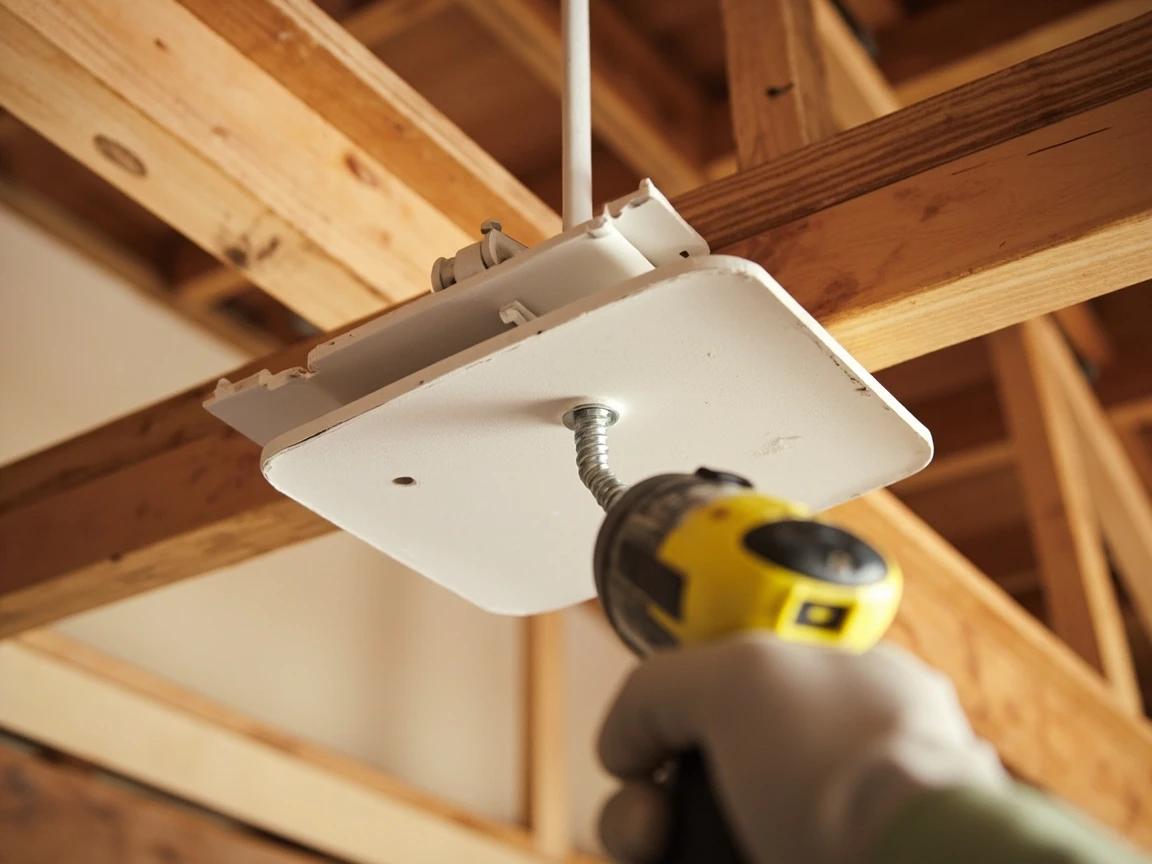
Mount the Housing to the Joist
Feed the existing electrical cable through the internal strain-relief clamp on the new housing and tighten the clamp screw. Position the housing in the ceiling hole with the flange tight against the joist and drive 1-1/4 inch drywall screws through the mounting flange into the wood. The housing should feel rock-solid — any wobble will transmit vibration and make the fan sound loud regardless of the sone rating.
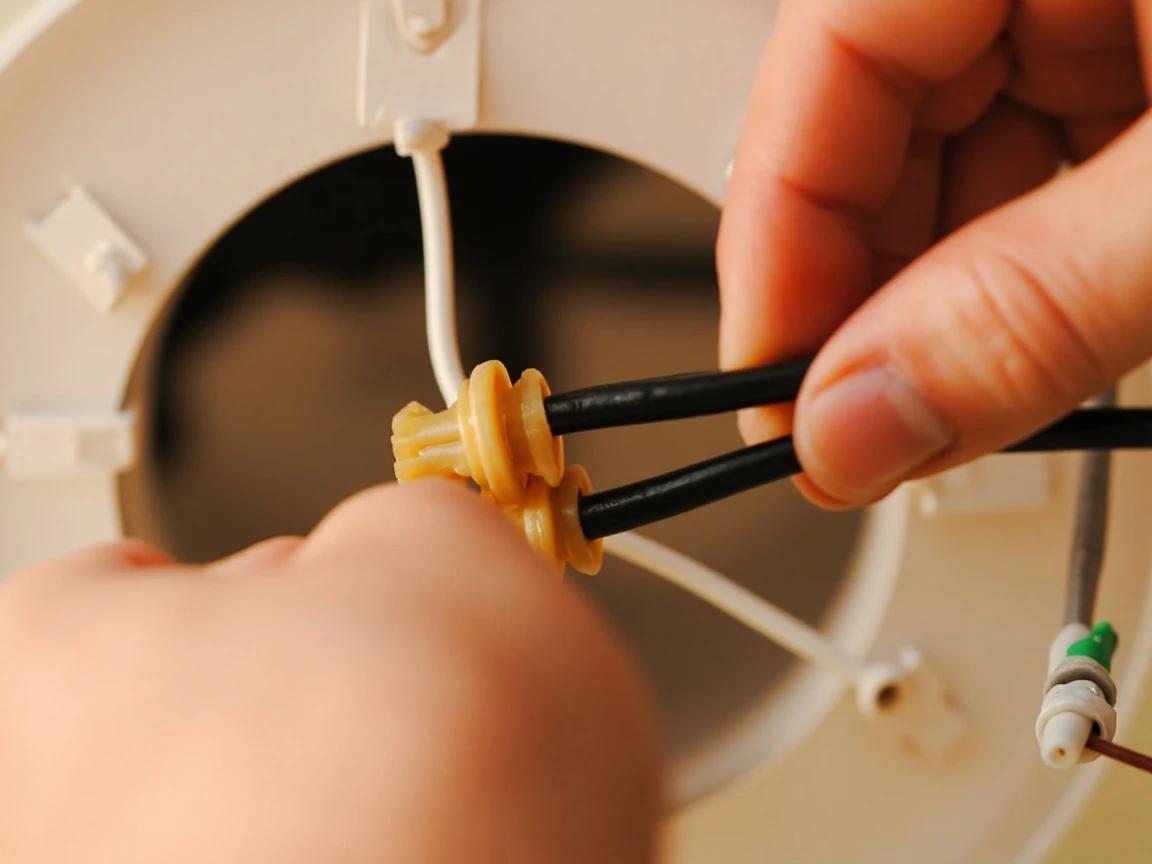
Make the Wire Connections
Inside the housing's wiring compartment, strip 3/4 inch of insulation off the house wires if needed. Connect black-to-black (hot), white-to-white (neutral), and ground-to-ground (green or bare copper) using yellow wire nuts, twisting clockwise until tight, then give each wire a firm tug to confirm it won't pull loose. Tuck the connections neatly into the compartment and replace the cover plate.
If your new fan has more wires than the old one (e.g., a separate light or heater), you may need to run 14/3 cable and add a second switch — plan for that before you open the walls.
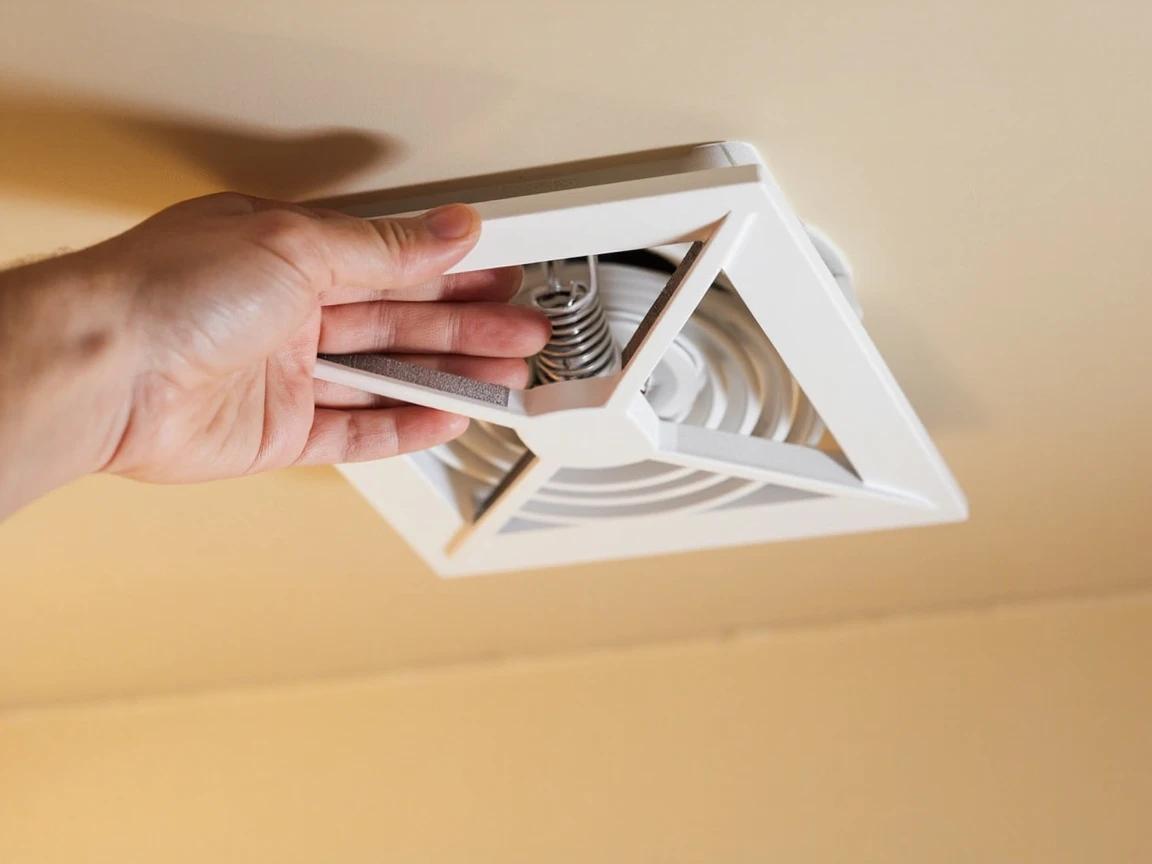
Install the Motor and Grille
Plug the motor assembly into the integrated outlet inside the housing and screw it into place with the provided mounting screws. Squeeze the grille's spring-steel mounting wires together and push them into the matching slots in the housing until the grille seats flush against the ceiling. Run a thin bead of silicone caulk around the outside edge of the grille only if required by the manufacturer — most modern grilles seat cleanly without it.
Test and Confirm the Venting Path
Flip the breaker back on and turn the fan switch — it should start quietly and draw a steady stream of air (hold a tissue to the grille to see it pull in). Run the shower for 5 minutes with the door closed and watch how fast steam clears; you should see a noticeable difference within 60 seconds. Finally, go outside and confirm the exterior vent flap is opening, proving the moist air is actually leaving the building envelope and not dumping into your attic.
Run the fan for 15–20 minutes after every shower — a timer switch ($25 at any hardware store) automates this and pays for itself the first time it prevents a moldy ceiling.
Frequently Asked Questions
What size CFM bathroom exhaust fan do I need?
+
Use 1 CFM per square foot of bathroom floor area, then round up to the nearest standard size (50, 70, 80, 90, or 110 CFM). A 7×10 bathroom needs a 70 CFM fan; add another 100 CFM if you have a whirlpool or jetted tub. For master baths, also look for a sone rating of 1.0 or lower so the fan is quiet enough to actually use.
Can I install a bathroom exhaust fan myself?
+
Yes — a like-for-like replacement (using the existing duct and electrical) is a 3-hour DIY project for anyone comfortable shutting off a breaker and making basic wire-nut connections. New installations that require running new electrical, cutting new ductwork, or installing a roof cap are significantly harder and may need a permit; check your local building code first.
Where can I vent a bathroom exhaust fan?
+
Vent through the roof (with a roof cap) or through a gable wall (with a wall vent). Never terminate the duct in an attic, soffit, crawl space, or between joists — moist bathroom air dumped into those spaces causes mold, rot, and ceiling stains within a single season. Keep the exterior termination at least 3 feet from any window or door.
Do I need a permit to replace a bathroom exhaust fan?
+
Most jurisdictions don't require a permit for like-for-like replacement that reuses existing wiring and ductwork. Permits are typically required when you add a new circuit, cut new framing, or install a new exterior vent termination. Always check with your local building department before starting if you're unsure.
How long should I run a bathroom exhaust fan after a shower?
+
Run the fan for 15-20 minutes after every shower or bath — this clears the steam and brings indoor humidity back below 50%, which is the threshold above which mold spores start growing on grout, drywall, and ceilings. A $25 timer switch automates this and pays for itself the first time it prevents a moldy ceiling.
Community Tips
💬 Sign in to share tips with the community
Sources & further reading
- Home Ventilation Guidance — Home Ventilating Institute
- Improving Indoor Air Quality — U.S. Environmental Protection Agency
More Electrical Guides
View all → Easy30 min
How to Fix Garage Door Sensors That Block Closing
When your garage door rolls down a few inches, stops, and reverses while the opener light blinks, the safety photo-eye sensors are almost always the cause — not the motor. This guide walks the fix in diagnostic order, from a ten-second lens wipe to realignment and a wiring check, so you fix it for free before spending $40 on parts you may not need.
 Easy15 min
How to Fix a Tripped Circuit Breaker
When a breaker trips, part of your home goes dark — and the breaker just did its job, cutting power before the wiring could overheat. This guide shows you how to reset it safely in about 15 minutes, how to read what the trip is telling you (overload, short circuit, ground fault, or arc fault), and the danger signs that mean you should leave it off and call an electrician.
 Easy45 min
How to Install a Smart Lock on an Exterior Door
A smart lock is the rare upgrade that's both safer and more convenient — keypad or phone entry, no spare key under the mat, and a log of who came and went — and on a standard pre-bored door it's a 45-minute swap with a single screwdriver, no electrician needed. The catch isn't wiring (there usually isn't any); it's buying a lock that actually fits your door and getting the bolt to line up so it never jams. This guide covers the compatibility check that prevents a costly return, the install itself, and the alignment and app setup that make it reliable.
You Might Also Like
 Easy45 min
How to Repair a Shower Diverter Valve
When you pull the diverter knob and water still pours from the tub spout instead of the showerhead, the fix is usually a worn washer or mineral buildup — not a $200 plumber visit. This guide covers the three most common diverter types (tub spout, three-valve, and two-valve) and walks you through cleaning, replacing washers, and swapping the diverter if needed, all in under an hour with basic tools.
 Easy1h 30m
How to Re-Caulk a Bathtub or Shower Surround
Mildewed, cracked, or peeling caulk around a bathtub isn't just ugly — it's letting water reach the drywall and studs behind the wall, which turns a $10 caulk job into a thousand-dollar tile-and-framing repair. This guide walks through removing the old caulk completely, treating mold, masking and tooling a clean single bead of 100% silicone, and the curing schedule that keeps the new joint waterproof for years.
 Hard4 hrs
How to Install Crown Molding
Crown molding turns a plain room into a finished one — but it is the trickiest trim to cut, thanks to corners that are never quite square and a profile that has to be cut upside down. This guide walks through the whole job the way a finish carpenter does it: coping inside corners so they stay tight, mitering outside corners, and fastening into framing instead of bare drywall. Expect about half a day for a typical room and roughly one to six dollars per linear foot in materials.