Spring Lawn Care Checklist

What you do to your lawn in the first six weeks of spring determines its health for the entire growing season. Follow this sequence to fix winter damage, encourage deep roots, and crowd out weeds before they establish.
What You'll Need
🛠 Tools
📦 Materials
Safety First
- •Never apply fertilizer to drought-stressed or dormant grass — it will burn the lawn.
Step-by-Step Instructions
Wait for the Right Timing
Don't rush spring lawn care. Wait until nighttime temperatures are consistently above 40°F and the soil has dried enough that walking on it doesn't leave deep footprints. Working on waterlogged spring soil compacts it and crushes new grass shoots. In most of the northern US, this means mid-to-late April.

Dethatch and Rake Thoroughly
Use a dethatching rake (spring-tine rake with curved blades) to vigorously rake the entire lawn, pulling up matted dead grass, thatch, leaves, and winter debris. Work in multiple directions. A thin layer of thatch (under 1/2 inch) is beneficial; anything thicker blocks water and fertilizer from reaching roots.

If thatch exceeds 1 inch, rent a power dethatcher for $50-80/day. It removes in 30 minutes what takes hours by hand.
Test and Amend Soil pH
Healthy lawns thrive at pH 6.0-7.0. A basic soil test kit costs $15 at garden centers; your local cooperative extension service often provides free testing with detailed recommendations. If pH is below 6.0 (too acidic), apply ground limestone per package directions. If above 7.5, apply sulfur.

Cooperative extension services are free county-level resources staffed by agronomists. They can tell you exactly what YOUR lawn needs based on your specific soil and grass type.
Core Aerate Compacted Areas
Rent a core aerator and run it over thin or high-traffic lawn areas. Core aeration pulls out plugs of soil (1/2-inch diameter, 3 inches deep), creating channels for water, oxygen, and fertilizer to penetrate to root level. This is especially important for clay soils or areas where water pools. Leave the plugs on the surface — they break down and return nutrients within 2 weeks.

Overseed Thin and Bare Spots
Scratch bare spots with a hand rake to expose loose soil. Spread grass seed at 1.5× the normal seeding rate (check the bag for your grass type). Press seed lightly into the soil surface with the back of the rake. Top-dress with a thin layer (1/8") of compost to help retain moisture. Keep seeded areas consistently moist until germination — typically 5-14 days.

Matching grass seed type is critical. Mixing cool-season fescue into a bluegrass lawn creates noticeable patches of different color and texture.
Apply Slow-Release Fertilizer
After the lawn has begun active growth (not before), apply a balanced slow-release fertilizer. Avoid high-nitrogen quick-release formulas in early spring — they push rapid top growth at the expense of root development. Follow package rates and apply when rain is in the forecast, or water immediately after.

Over-fertilizing is worse than not fertilizing. Excessive nitrogen causes thatch buildup, disease susceptibility, and burning. More is not better.
First Mow at Correct Height
Set your mower to 3 inches — the single most important mowing adjustment you can make. Taller grass shades out weed seeds, develops deeper roots, and stays greener longer in drought. Sharpen the blade if you haven't since last season; a dull blade tears grass instead of cutting it, leaving brown-tipped, disease-prone edges.

Leave grass clippings on the lawn. They decompose within a week and return nitrogen equivalent to one fertilization per season — free.
Establish Deep Watering Habits
Once the lawn is established and growing, water deeply once or twice a week (1-1.5 inches total) rather than lightly every day. Deep watering forces roots down into cooler, moister soil layers where they become drought-resistant. Shallow daily watering encourages roots to stay near the surface where they're vulnerable to heat and drought.

Frequently Asked Questions
How long does it take to spring lawn care checklist?
+
This project typically takes about 3 hrs. The guide includes 8 steps with detailed instructions for each.
What tools do I need?
+
You will need: Dethatching rake or power dethatcher, Lawn mower with sharp blade, Fertilizer spreader, Core aerator (rental). Materials include: Grass seed (matching your lawn type), Slow-release lawn fertilizer (10-10-10 or similar), Lime (if soil pH is below 6.0), Starter fertilizer for overseeded areas.
Is this a good project for beginners?
+
Yes! This is rated as an easy project that most homeowners can complete with basic tools and no prior experience.
Community Tips
💬 Sign in to share tips with the community
Sources & further reading
- Spring lawn care — University of Minnesota Extension
- Lawn Maintenance Calendar — University of Maryland Extension
More Gardening Guides
View all → Easy3 hrs
How to Winterize Your Garden
A few hours of fall garden prep is the difference between a thriving spring and a cleanup nightmare in March — proper winterization prevents frost heave, protects perennials from -20°F lows, kills overwintering pests, and adds 2-3 weeks of free growing time next season. This guide covers the eight tasks every gardener should knock out 4-6 weeks before the first hard frost: cleanup, weeding, perennial cutback, bulb storage, soil amending, mulching, deep watering, and irrigation drain-down.
 Easy1h 15m
How to Edge Garden Beds Cleanly
Crisp bed edges are the single fastest way to make a yard look professionally maintained — yet most homeowners never re-cut them after the original landscaping. A clean spade-cut trench takes about an hour per 50 linear feet, costs nothing beyond a sharp edger, and instantly separates turf from mulch so grass stops creeping into your plantings. This guide walks you through marking a smooth line, cutting a defined trench, removing sod, and maintaining the edge all season.
 Easy1 hr
How to Control Grubs and Lawn Pests
White grubs — the C-shaped larvae of Japanese beetles, June bugs, and chafers — are the number one underground lawn pest in North America, and a heavy infestation can destroy an entire lawn in a single season by severing grass roots just below the surface. The good news is that a single well-timed application of preventive grub control in late spring or early summer eliminates 75-100% of grubs before they cause damage, and the whole job takes under an hour with a broadcast spreader. This guide covers confirming you actually have a grub problem, choosing between preventive and curative treatments, applying the product correctly, and maintaining a grub-resistant lawn year after year.
You Might Also Like
 Easy30 min
How to Replace an Electrical Outlet
A worn-out or discolored electrical outlet is one of the simplest electrical repairs you can tackle yourself — swapping one takes about 15-30 minutes and costs under $5 in parts versus $75-150 for an electrician visit. This guide walks you through safely replacing a standard duplex receptacle, including how to handle the wiring correctly and avoid the most common DIY mistakes.
 Medium1 hr
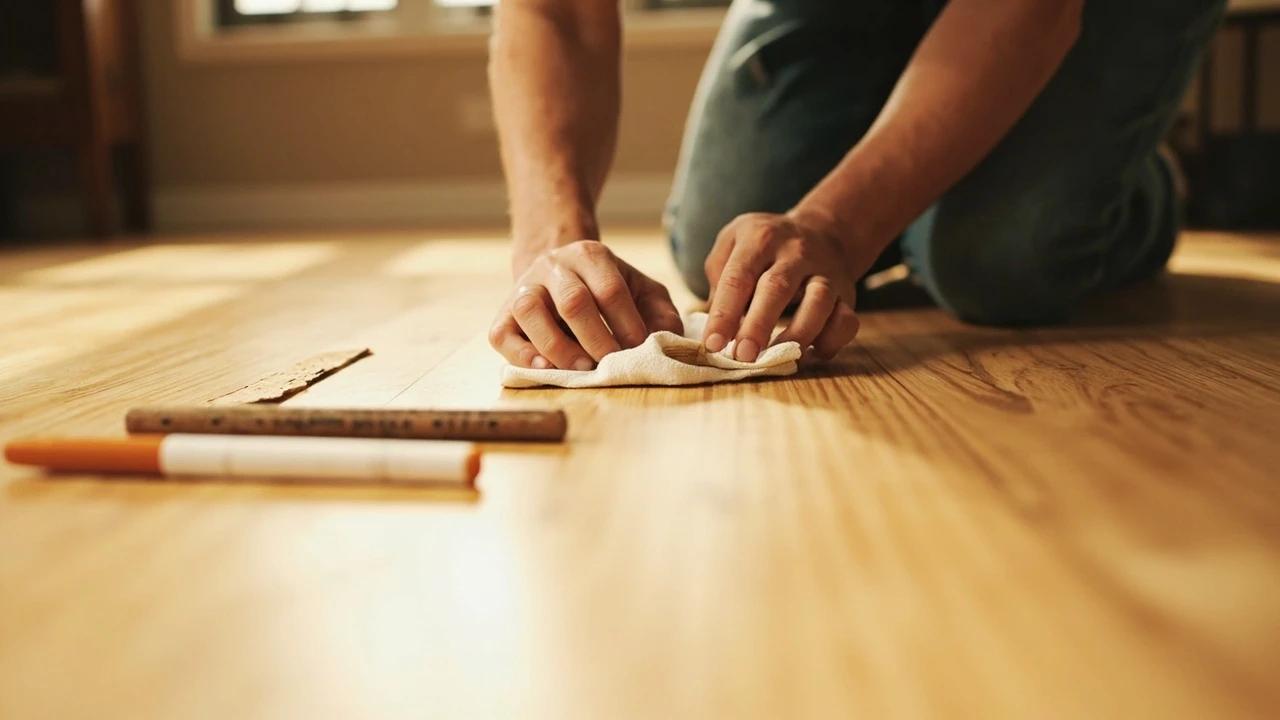
How to Repair Scratches in a Hardwood Floor
Scratched hardwood almost never means refinishing the whole floor. This guide shows you how to match the fix to the damage — a touch-up marker for finish-level scratches, a wax fill stick for shallow ones, and stainable wood filler with stain and polyurethane for deep gouges — all for under $40 in supplies and about an hour of work.
 Medium2 hrs
How to Patch a Large Hole in Drywall
A doorknob blowout, a wall-anchor failure, a fist through the drywall during the move-out — these holes are too big for spackle but too small to justify cutting in a full drywall section. The mesh patch (for 1/2-inch to 4-inch holes) and the California patch (for 4 to 8-inch holes) both finish flush, paint over invisibly, and cost under $25 in materials. The job takes about two hours of hands-on work spread over two or three days of compound cure time.