How to Fix a Sticking Door

A sticking interior door is one of the easiest "I have to call somebody" jobs you can quietly fix yourself — most of the time, the entire repair is tightening a single hinge screw or swapping it for a longer one. The full diagnostic and fix takes 30 to 60 minutes with tools you already own, and the total material cost is usually zero. Save planing the door edge for last; nine times out of ten you do not need to take a single shaving off the wood.
What You'll Need
🛠 Tools
📦 Materials
Safety First
- •Do not remove a door without a helper or a sturdy support — a 1-3/8" solid-core interior door weighs 40-60 lbs and can dent flooring or trim if it tips.
- •If you live in a home built before 1978 and the door has its original paint, assume it contains lead — bag your sanding dust and avoid dry-sanding inside the house. An EPA RRP-certified contractor is required by law if a renovator removes more than 6 square feet of painted surface for hire.
Step-by-Step Instructions
Find Exactly Where the Door Is Rubbing
Open and close the door slowly while watching the gap around the top, latch side, and bottom — look for scuff marks, witness lines, or a thin layer of paint worn shiny. For a more precise test, close the door on a strip of plain printer paper held at the suspect spot: pull the paper down and feel for drag. If the paper tears or refuses to move, that is where the wood is touching. Repeat at top, middle, and bottom of the latch edge, then the hinge edge, then top. Mark each rubbing point with a pencil tick on the door edge.

If the paper test feels imprecise, rub a stick of children's chalk along the suspect door edge, close the door firmly, then reopen. The chalk transfers to the jamb exactly where the contact is — far more accurate than guessing.
Tighten Every Hinge Screw With a Hand Screwdriver
With the door open, work your way through every screw on both hinge leaves (the side attached to the door and the side attached to the jamb), turning each one clockwise with a #2 Phillips screwdriver until it stops snug. Use a hand screwdriver, not a drill — the torque from a drill strips softwood jamb threads in a fraction of a second and you will only feel it after the damage is done. Many sticking doors are fixed completely at this step, especially if the door rubs the top corner on the latch side, because that pattern almost always means the top hinge has worked loose.

If a screw spins endlessly and never tightens, the threads are stripped. Do not crank harder — go to Step 3 and replace it with a longer screw. Cranking a stripped screw makes the hole worse.
Replace One Top-Hinge Screw With a 3-Inch Screw Into the Stud
Remove the center screw on the jamb side of the top hinge and replace it with a 3-inch #10 wood screw that matches the existing screw head finish (usually brass or bronze). The new screw is long enough to drive past the jamb and bite into the framing stud behind it, pulling the entire door frame back toward the wall and lifting the door corner by 1/16 to 1/8 of an inch. This single trick fixes the majority of doors that sag at the top latch corner. Predrill a 1/8-inch pilot hole through the existing screw hole before driving the long screw to avoid splitting the jamb.

Buy a small box of #10 x 3" screws in brass for under $5 at any hardware store — keep a few in your toolbox. It is the single highest-leverage fastener in homeowner DIY.
Close and Re-Test the Door
Close the door slowly and feel for the rub. If the door now closes cleanly and the latch engages without lifting or pushing, you are done — re-paper-test the original sticking point to confirm. If it still sticks but in a different spot (e.g., it was sticking at the top and now sticks at the bottom of the latch edge), the long screw over-corrected; back it out one full turn and re-test. About 70% of sticking-door jobs end here.

Shim Behind a Hinge to Shift the Door Laterally
If the door still rubs on the latch side after Steps 2-3, the fix is to push the door away from the latch jamb by adding a thin shim behind one of the hinge leaves on the jamb. Remove the screws on the hinge nearest the rubbing point, swing the hinge leaf out, cut a piece of cardboard or composite shim to the shape of the hinge mortise, and place it in the recess before re-seating the hinge. A single shim 1/32 to 1/16 inch thick moves the latch edge about the same amount in the opposite direction. Use shim behind the top hinge if the door rubs the top, the bottom hinge if it rubs the bottom.

A piece of cereal-box cardboard cut with a utility knife is the perfect free shim. For thicker shims, the cardboard backing from a notepad works well — never use folded paper, which compresses over time and reverses the fix.
Mark the Plane Line, Then Remove the Door
Only at this point should you consider planing the door. Close the door against the chalk marks one more time, then draw a single pencil line along the entire length of the rubbing edge, exactly at the rub point and no further. Open the door, drive out the hinge pins from the bottom up with a small hammer and a nail set or large nail, and lift the door clear with a helper. Lay it on a pair of sawhorses with the rub edge facing up. A standard 30 x 80" interior door at 1-3/8" thick weighs 25-30 lbs hollow-core or 45-60 lbs solid-core.

Drive the hinge pins from the BOTTOM up. If you tap them down, the bottom pin will not fall out and you cannot get a tool under the head of the top pin to lift the door free.
Plane the Pencil-Marked Edge
Set the door edge-up on the sawhorses. With a sharp block plane set to a very light cut (the blade should protrude no more than the thickness of a business card below the sole), make long, steady strokes along the grain from one end of the rub area to the other. Stop every two or three passes and check the line — you want to take the door down exactly to the pencil mark, no further. For more than 1/16 inch of removal, an electric hand planer is faster and more consistent. Plane the edge with a slight back-bevel angled into the door interior so the new edge will not catch the jamb when you rehang it.

Plane the hinge edge whenever possible instead of the latch edge — the latch and lockset are mortised on the latch side, and re-cutting those mortises after planing is a much larger job. The hinge edge has more "free space" because the hinges sit in shallow mortises that can be deepened with a chisel if needed.
Sand, Seal, and Rehang
Smooth the planed edge with 120-grit sandpaper followed by 220-grit, then wipe the dust off with a slightly damp cloth and let it dry for 10 minutes. Brush on a single coat of touch-up paint, stain, or clear polyurethane to seal the bare wood — unsealed door edges absorb humidity and swell, undoing the fix in the next season. Once the finish is dry, rehang the door (pins from the top down this time, starting with the top hinge), close it slowly, and paper-test the gap one final time. The clearance should be roughly the thickness of a nickel along the entire edge.

A nickel is 1.95 mm thick and is the universally accepted "perfect door gap." Walk around with one in your pocket while you check the final fit — slip it into the gap at top, middle, and bottom of the latch side. It should slide in everywhere without forcing.
Frequently Asked Questions
Why does my door stick only in summer?
+
Wood doors swell when indoor humidity is high (usually June through September in most US climates) and shrink back in winter. If the door rubs only in summer and frees up by December, the cause is seasonal swelling — do not plane it, because the door will sit loose in the opening once humidity drops. Instead, run a dehumidifier or AC to hold indoor humidity between 30% and 50%, and rub a bar of soap or a wax candle on the friction spot to get through the few sticky weeks.
Should I tighten hinge screws with a drill or a screwdriver?
+
Use a hand screwdriver, not a drill. A drill spins fast enough to strip the wood threads in the door jamb before you feel the screw bottom out, especially on softwood (pine, fir) jambs. Once the threads are stripped, the screw spins forever and the hinge is loose again — a much harder fix than the original problem. Reserve the drill for the moment when you replace the short hinge screw with a 3-inch one that reaches the framing stud.
How much should I plane off a sticking door?
+
Take off the absolute minimum — the gap between the door and the jamb should end up about the thickness of a nickel (roughly 1/16-inch or 1.5 mm). If you plane more than that, the door will rattle and let light through during the dry months. Mark the rub line in pencil, plane just to the line, and rehang to check before taking more.
What does it mean if multiple doors are sticking at once?
+
Multiple sticking doors that all started at the same time — especially combined with drywall cracks above door frames, gaps where walls meet floors, or doors that swing open on their own — usually point to foundation settlement, not a hinge problem. Tightening or planing each door is futile because the frame keeps shifting; the underlying foundation issue needs a structural assessment first. Single sticking doors that have done it for years are almost always a hinge or humidity fix.
Can I plane a hollow-core door?
+
Yes, but only by a small amount — usually no more than 1/8-inch off the latch edge before you risk planing through the thin wood skin and exposing the cardboard honeycomb core inside. Hollow-core doors have a solid edge strip that is typically 1 to 1-1/4 inches wide; once you cross into the honeycomb, the door is junk. If you need to remove more than 1/8-inch, replace the door rather than plane it.
Community Tips
💬 Sign in to share tips with the community
Sources & further reading
- How to Fix Sagging or Sticking Doors (DIY) — Family Handyman
- How to Fix a Door That Sticks — This Old House
- How to Plane a Door — Bob Vila
More Carpentry Guides
View all → Medium8 hrs
How to Install Laminate Flooring
Click-lock laminate is the most beginner-friendly floor you can lay — it floats over an underlayment with no nails, no glue, and no wet saw. This guide walks the full job: acclimating the planks, flattening the subfloor, getting a dead-straight first row, staggering the joints, and finishing the edges. Expect about a day of work for a typical room and roughly $2 to $5 per square foot in materials, a fraction of a pro install.
 Medium8 hrs
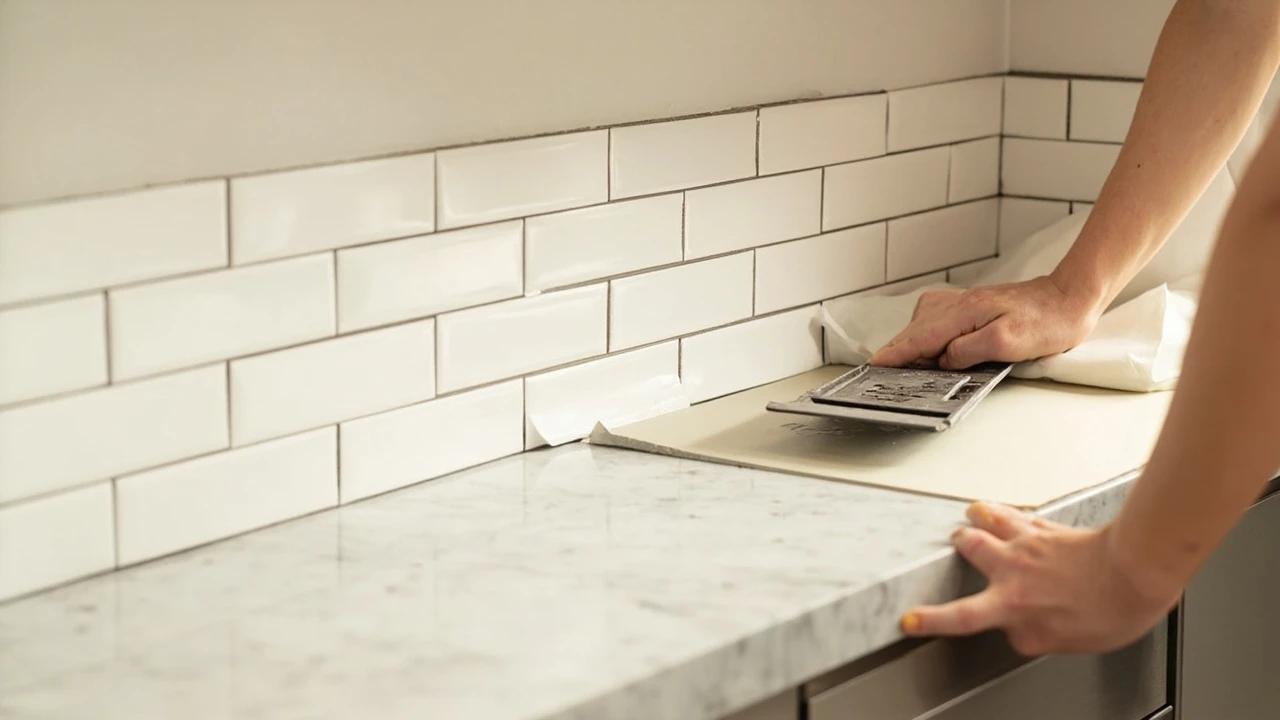
How to Install a Tile Backsplash
A tile backsplash is the highest-impact weekend upgrade in a kitchen — it transforms the room for $150 to $400 in materials, far less than the $800-plus a pro charges to install one. The work is genuinely DIY with patience: the secret isn't artistic skill, it's a level ledger board, the right adhesive, and caulking the corners instead of grouting them. This guide walks the whole job over painted drywall, from dry-laying the layout to the final bead of caulk.
 Hard4 hrs
How to Install Crown Molding
Crown molding turns a plain room into a finished one — but it is the trickiest trim to cut, thanks to corners that are never quite square and a profile that has to be cut upside down. This guide walks through the whole job the way a finish carpenter does it: coping inside corners so they stay tight, mitering outside corners, and fastening into framing instead of bare drywall. Expect about half a day for a typical room and roughly one to six dollars per linear foot in materials.
You Might Also Like
 Medium45 min
How to Install a GFCI Outlet
A GFCI outlet cuts power in a fraction of a second when it senses electricity leaking to ground — the exact protection code now requires in kitchens, bathrooms, garages, basements, laundry rooms, and anywhere outdoors. Installing one yourself takes about 45 minutes and costs $15-25 in parts versus $120-250 for an electrician. This guide shows you how to wire the LINE and LOAD terminals correctly so the outlet actually works the first time — and how to protect a whole string of downstream outlets from a single device.
 Easy1h 30m
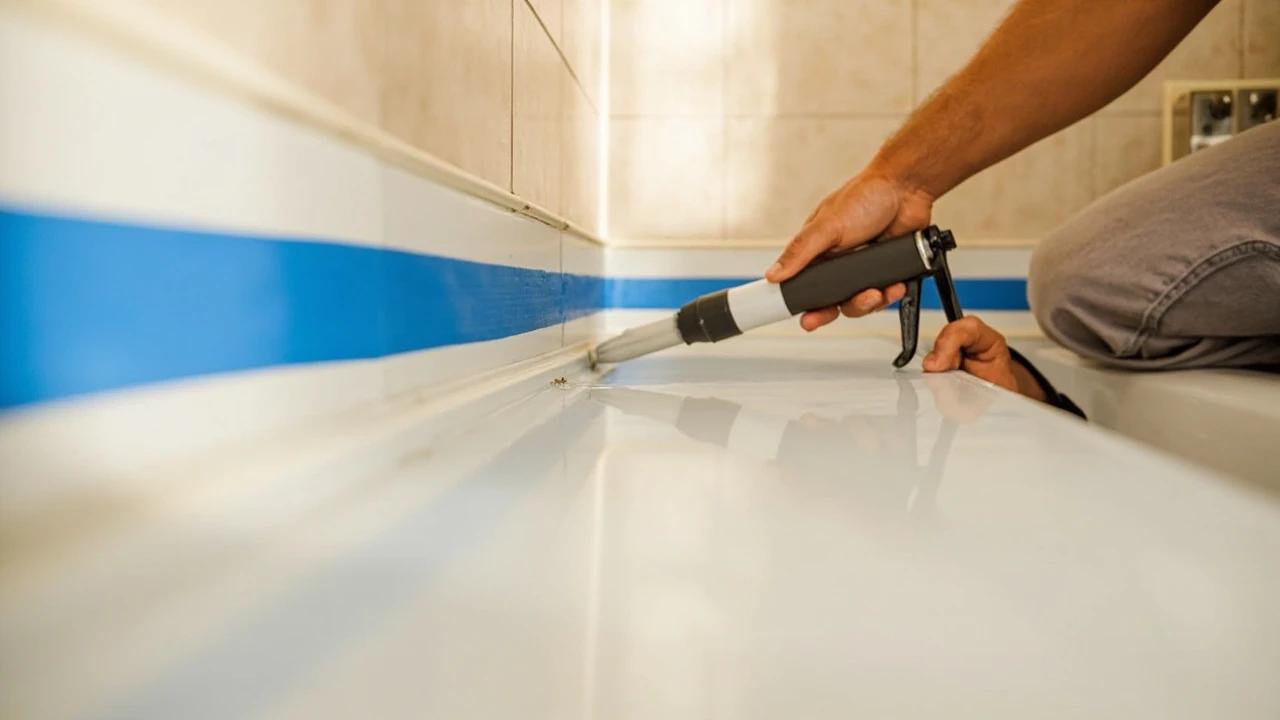
How to Re-Caulk a Bathtub or Shower Surround
Mildewed, cracked, or peeling caulk around a bathtub isn't just ugly — it's letting water reach the drywall and studs behind the wall, which turns a $10 caulk job into a thousand-dollar tile-and-framing repair. This guide walks through removing the old caulk completely, treating mold, masking and tooling a clean single bead of 100% silicone, and the curing schedule that keeps the new joint waterproof for years.
 Medium45 min
How to Install a Ceiling Fan
Replacing a light fixture with a ceiling fan improves air circulation in summer and can reduce heating costs in winter by circulating warm ceiling air downward. Most installs take 45-60 minutes.