How to Replace a Toilet Flapper Valve

A worn-out flapper is the cause of roughly 90% of "phantom flush" and running-toilet problems, and replacing it is the single cheapest plumbing fix in the house — $5 to $15 for a new flapper and 20 minutes of your time. A leaking flapper wastes 200 gallons of water per day at the high end, which can add $30 to $50 a month to a typical water bill. This guide covers sizing the right replacement, cleaning the valve seat so the new flapper actually seals, and dialing in the chain length so the toilet stops running for good.
What You'll Need
🛠 Tools
📦 Materials
Safety First
- •Turn off the toilet supply valve (the small oval handle at the wall behind the toilet) BEFORE you lift the tank lid — if you forget and bump the float, the fill valve will spray water across the bathroom in seconds.
Step-by-Step Instructions
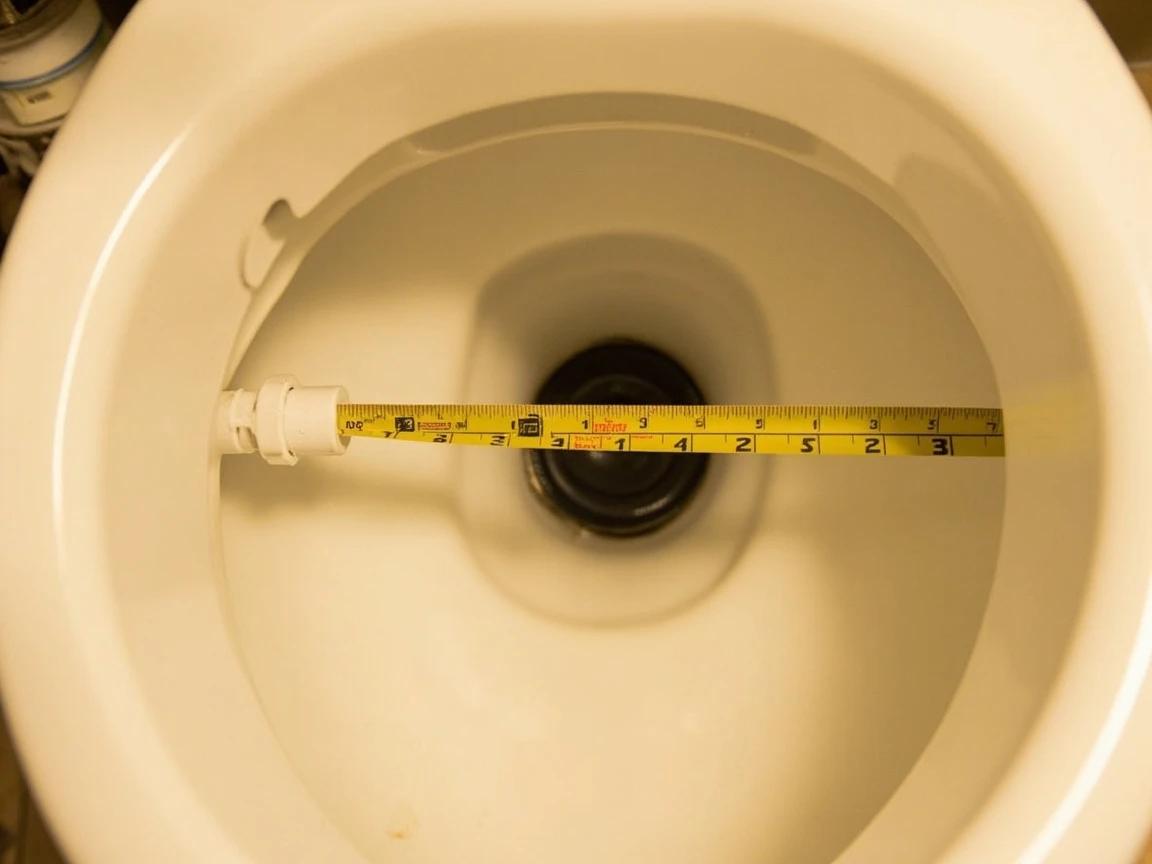
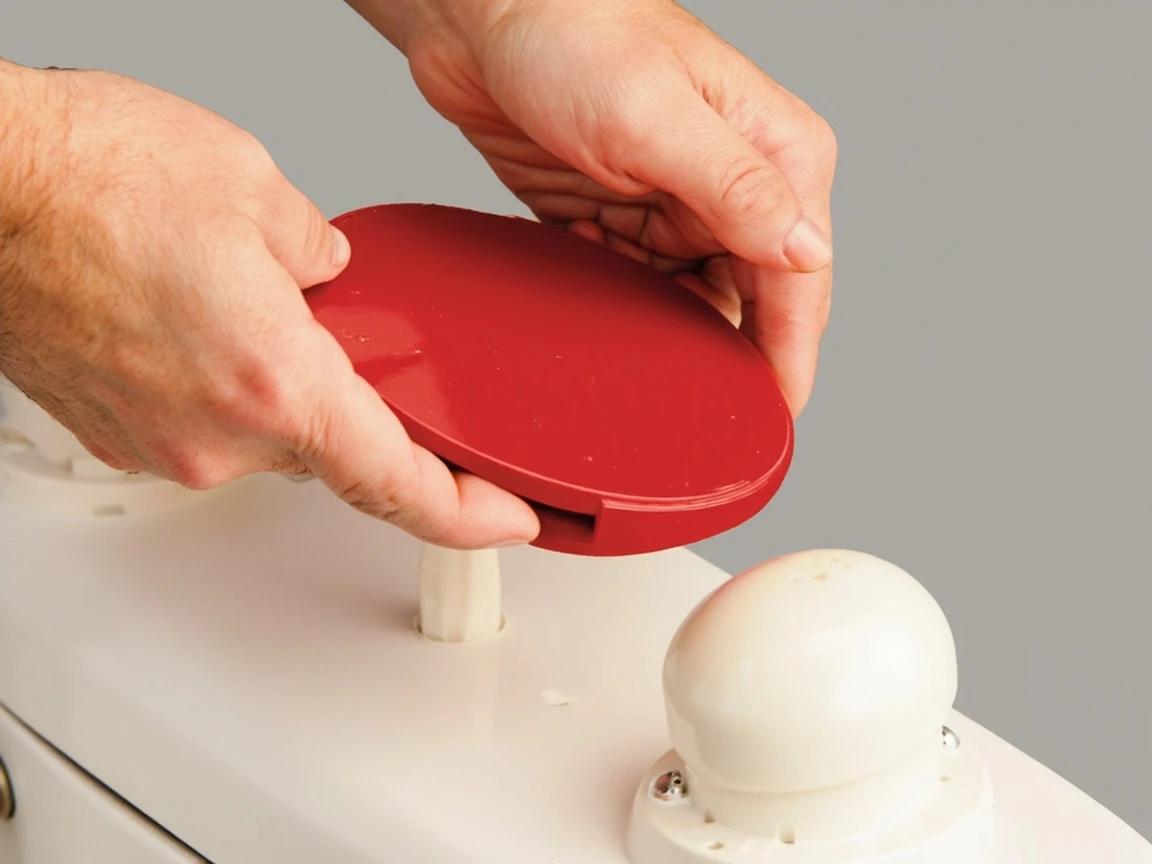
Measure the Flush Valve Opening to Size the New Flapper
Lift the tank lid off and set it on a folded towel on the floor (lids are porcelain and will chip on tile). Look down into the tank at the drain at the bottom — that is the flush valve. Hold a tape measure across the diameter of the opening: a 2-inch opening is roughly baseball-sized and is what most toilets built before 2005 use, while a 3-inch opening is closer to tennis-ball-sized and is found on newer 1.28 gallon-per-flush high-efficiency models. Write the size down or take a photo before going to the hardware store.
If you are not sure which size you have, buy both a 2-inch and a 3-inch universal flapper for under $15 total and return the one you do not use. The trip back to the hardware store costs more in time than the unused part costs in money.
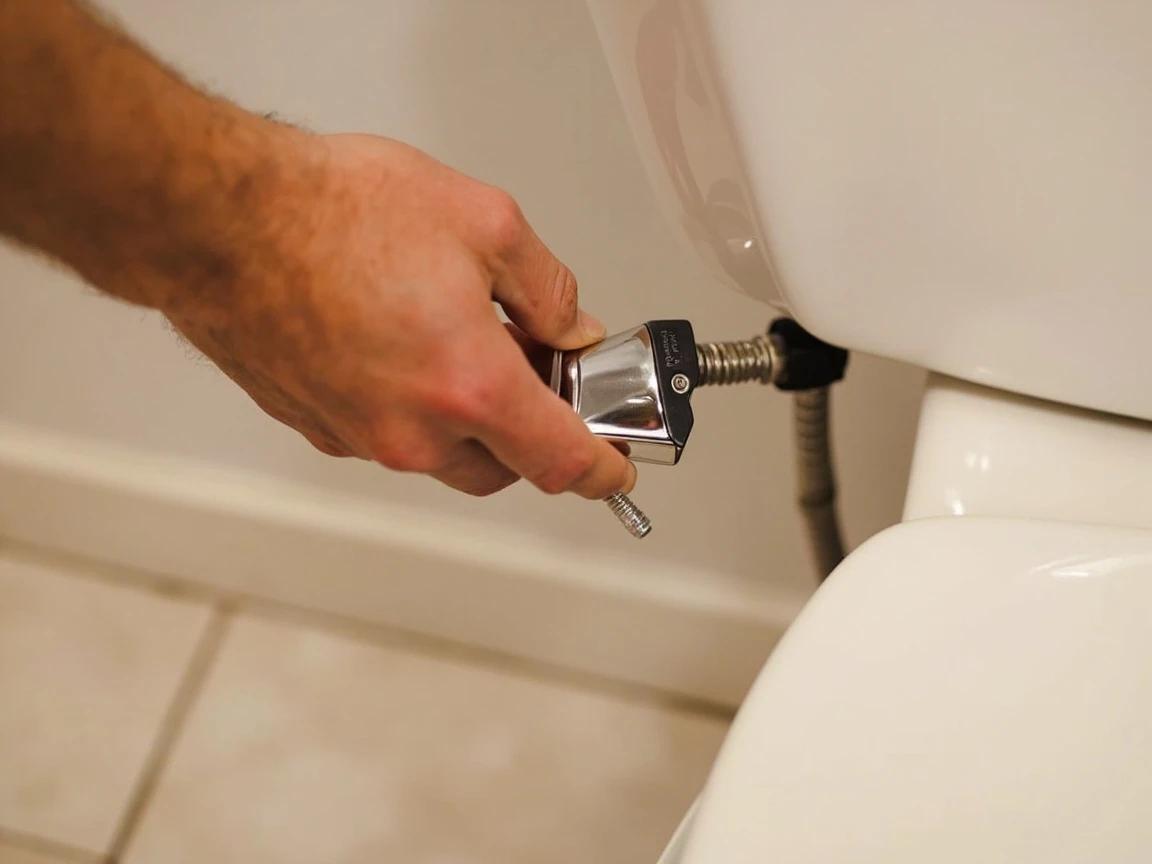
Shut Off the Water Supply at the Toilet
Reach behind the toilet to find the angle stop valve on the wall where the supply line meets the toilet. Turn the small oval handle fully clockwise until it stops — usually about a quarter turn for modern quarter-turn valves, or several full turns for older multi-turn valves. Hold the flush handle down to drain most of the tank into the bowl. You will hear the tank empty in about 10 to 15 seconds.
Do not skip this step. If you forget and the float drops while the supply is on, the fill valve will run continuously and spray water out of the open tank within a few minutes. Confirm the supply is off by flushing once — the tank should drain and stay empty.
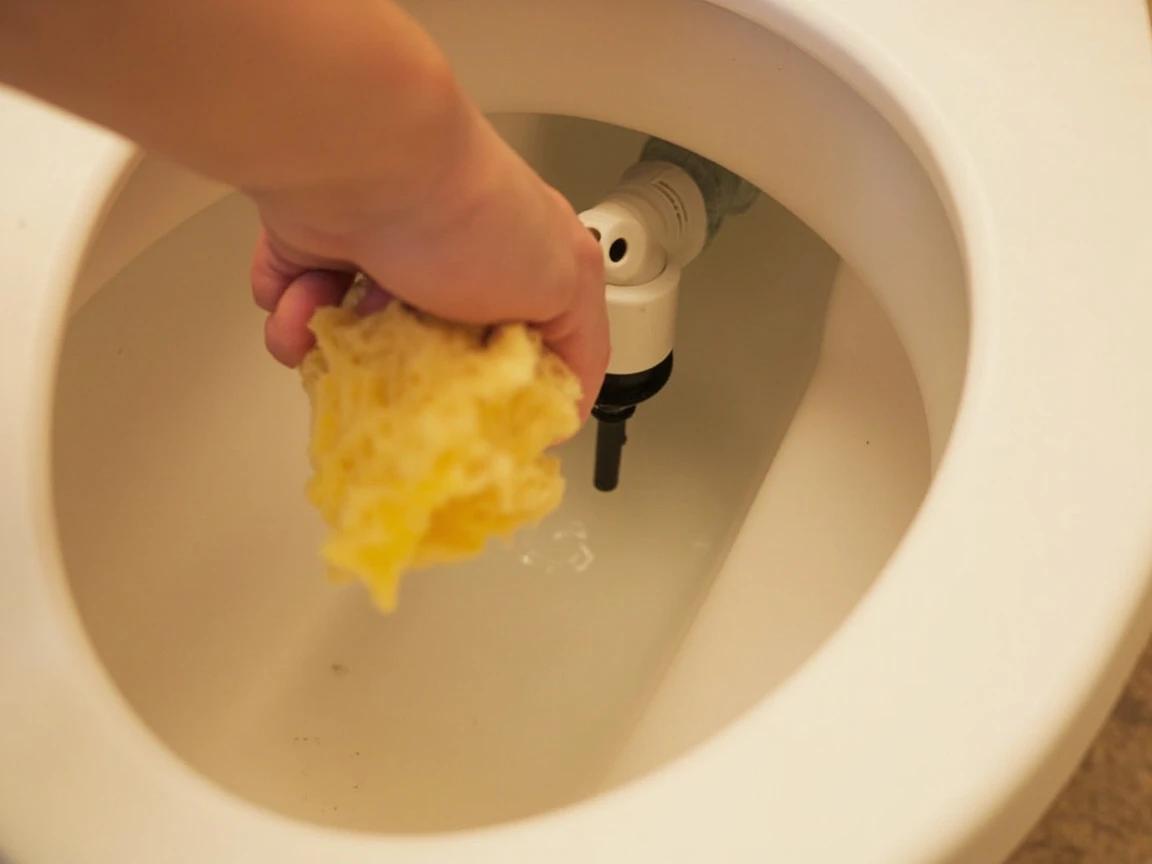
Sponge Out the Remaining Tank Water
Even after flushing, the tank holds about half an inch of water below the flush valve opening. Use a sponge or thick rag to soak that up and wring it into the toilet bowl. Keep going until the bottom of the tank is dry enough to see the porcelain — water that drips while you are working will spray when you handle the flapper. This takes about 90 seconds and a sponge will hold a full tank rinse in three or four wrings.
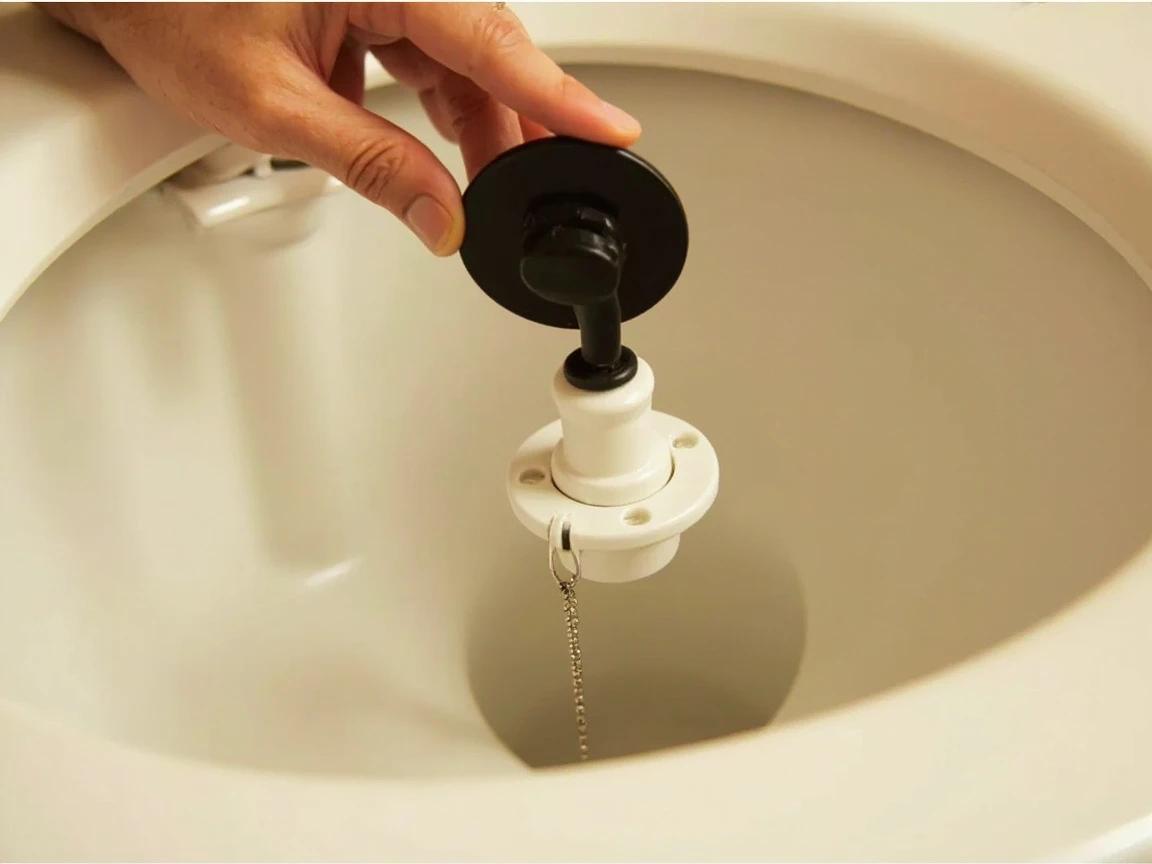
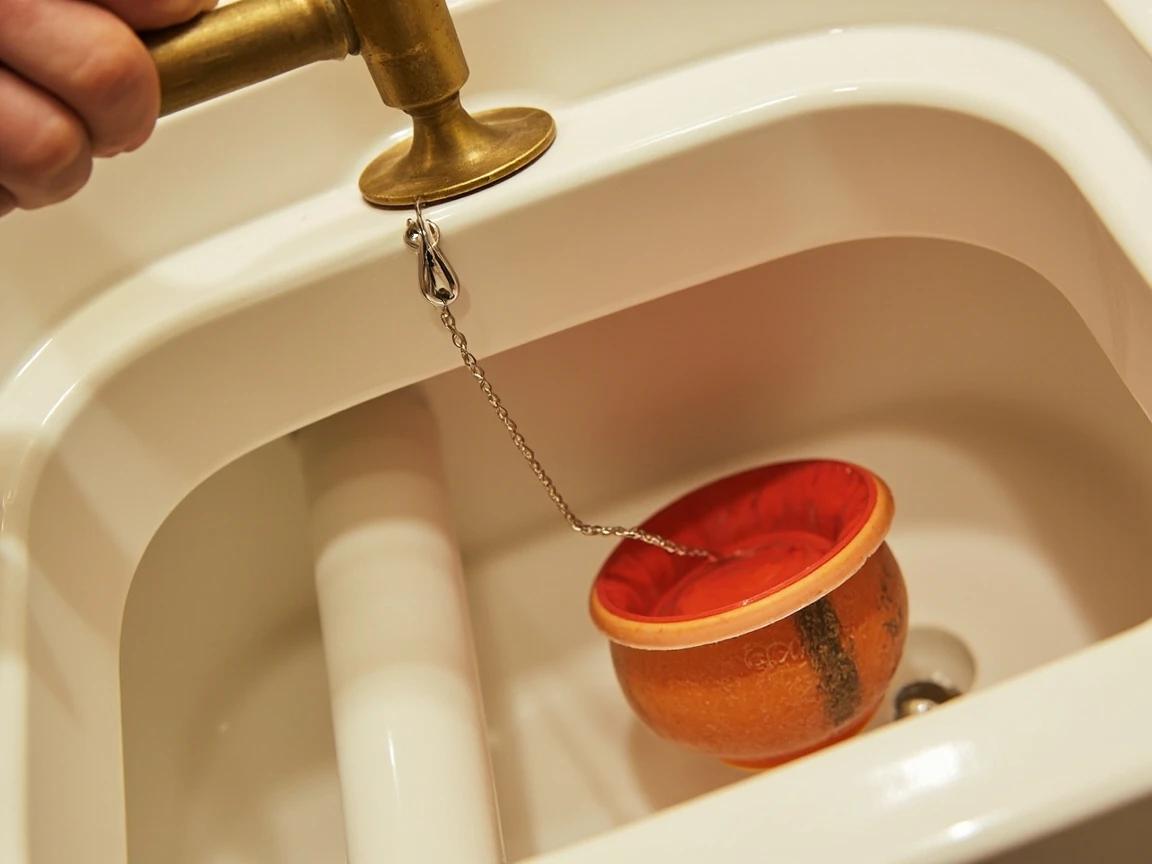
Unhook the Old Flapper From the Flush Valve Ears
The flapper has two small rubber ears on its hinge that slide onto two posts on the sides of the flush valve. Pinch each ear at its slot and pull outward — they pop off with light finger pressure. Once both ears are free, lift the flapper out the top, then unclip the lift chain from the toilet handle arm (squeeze the small clip on the end). Take both the flapper and a clear photo of how the chain attached, then carry the old flapper to the store as your matching reference.
Drop the old flapper in a sandwich bag and bring it with you to the hardware store. The aisle has 30 similar-looking parts and matching a physical sample is faster than reading model numbers off a phone.
Clean the Flush Valve Seat
The flush valve seat is the smooth rubber-or-plastic ring around the drain opening that the flapper presses against. Mineral buildup on this ring is the most common reason a freshly replaced flapper still leaks — even a thin film of calcium prevents a tight seal. Pour a small puddle of white vinegar onto the seat, let it sit for 5 minutes, then scrub the entire ring with an old toothbrush or soft nylon brush. Wipe it dry with a clean rag and run a fingernail around the seat — it should feel smooth, with no gritty patches or pits.

If you can feel pits or gouges in the seat that do not scrub away, that is the underlying problem — not the flapper. A flapper-and-seat-repair kit (about $20) includes a stick-on replacement seat that adheres to the damaged surface; otherwise the entire flush valve needs to come out.
Hook the New Flapper Onto the Flush Valve Ears
Take the new flapper and slide its two rubber ears onto the same posts the old one came off. Press each ear firmly until you feel it click into place — it should sit centered over the valve seat with no tilt. Some universal flappers have a removable foam or rubber ring around the bottom that adjusts the flush volume; leave it in place for now and tune it later if your toilet flushes weakly. Lift the flapper up and let it drop a few times to confirm it falls cleanly onto the seat without snagging.
Connect and Adjust the Lift Chain
Hook the chain onto the same hole in the toilet handle arm that the old chain used. With the flapper resting flat on the seat, the chain should have about one half inch of slack — roughly one or two links — between the handle and the chain clip. Too tight and the chain holds the flapper open by a hair, creating a constant slow leak; too loose and the handle does not lift the flapper far enough, giving you a weak flush. If the chain has 6+ extra links dangling, snip them off with wire cutters or hook a higher link onto the clip — extra chain can drop under the flapper and prevent it from closing.
The "right" chain length test: flush once and watch from above. The flapper should swing fully open and stay open until the tank drains, then fall flat. If the flapper closes early (weak flush), the chain is too long. If the flapper does not fully seat after the flush, the chain is too short.
Turn the Water Back On and Run a Dye Test
Open the shutoff valve counterclockwise slowly over 10 seconds to refill the tank — abrupt opening causes water hammer that can stress the new flapper. Let the tank fill completely, then drop 3 to 5 drops of food coloring (any color but yellow) into the tank and DO NOT flush for 15 minutes. Walk away, then come back and look in the bowl. If colored water has appeared in the bowl, the flapper is still leaking — re-check chain length and seat cleanliness. If the bowl water is still clear, the seal is good and you are done.
Replace the tank lid before you walk away for the 15-minute wait — both to protect the porcelain and to remind you not to flush. A piece of painter's tape across the handle as a reminder also works.
Frequently Asked Questions
How do I know if I need a 2-inch or 3-inch flapper?
+
Look at the flush valve drain opening at the bottom of the tank. Most toilets made before 2005 and standard 1.6 gallon-per-flush models use a 2-inch opening (roughly the diameter of a baseball); newer high-efficiency 1.28 gpf toilets use a 3-inch opening (closer to a tennis ball). The surest test is to remove the old flapper and bring it to the store, but a tape measure across the opening works too — measure the hole, not the flapper itself.
Why is my toilet still running after I replaced the flapper?
+
Three culprits, in order of frequency: the chain is too tight (it is propping the flapper open by a hair you cannot see), the flush valve seat has mineral buildup that prevents a full seal, or the seat is warped or pitted. Set the chain to one or two links of slack, drain the tank again and scrub the seat with white vinegar and a soft brush, and run the dye test in Step 8 to confirm. If it still leaks after all three, the flush valve casting itself is damaged.
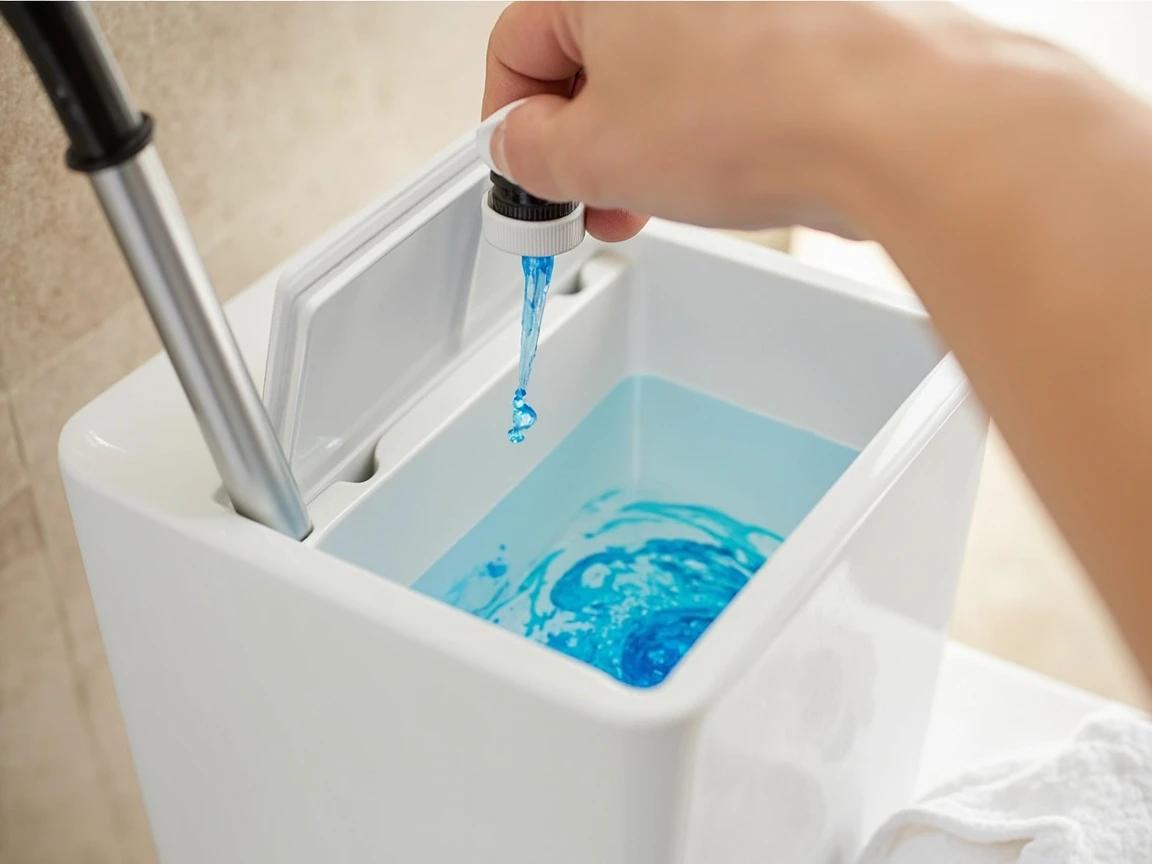
Are chlorine tablets bad for toilet flappers?
+
Yes — chlorine tablets dropped directly into the tank are the single biggest reason "I just replaced this a year ago" flappers fail. The chlorine attacks rubber and most silicone, warping the flapper and pitting the metal flush handle linkage within 6 to 18 months. Switch to in-bowl cleaners (drop-ins under the rim or cling gels) and your new flapper will last 4 to 6 years instead of one season.
How long does a toilet flapper last?
+
A standard rubber flapper lasts 4 to 6 years in normal tank water, and a premium silicone flapper (Korky Plus or equivalent) lasts 8 to 10 years. Hard water, well water, and chlorine tablets all shorten that significantly — in heavy-buildup water, expect 2 to 3 years even from a good flapper. If you can flex the old flapper between your fingers and it feels stiff or shows surface cracks, it is past due.
Can I use a universal flapper or do I need a brand-specific one?
+
A universal flapper fits roughly 80% of toilets and is the right first try because they cost $5 to $8 versus $12 to $20 for brand-specific. Some toilets have unique flush valve geometries — notably the American Standard Champion 4, certain Toto Drake models, and Kohler Class Five towers — that need their own flapper for a clean seal. If a universal does not seal after chain adjustment and seat cleaning, that is when to find your toilet brand and model number stamped inside the tank and order the brand-specific version.
Community Tips
💬 Sign in to share tips with the community
Sources & further reading
- How to Replace Toilet Flapper — Korky
- How to Fix a Running Toilet — Family Handyman
- How to Identify and Fix Toilet Flapper Leaks — Fluidmaster
More Plumbing Guides
View all →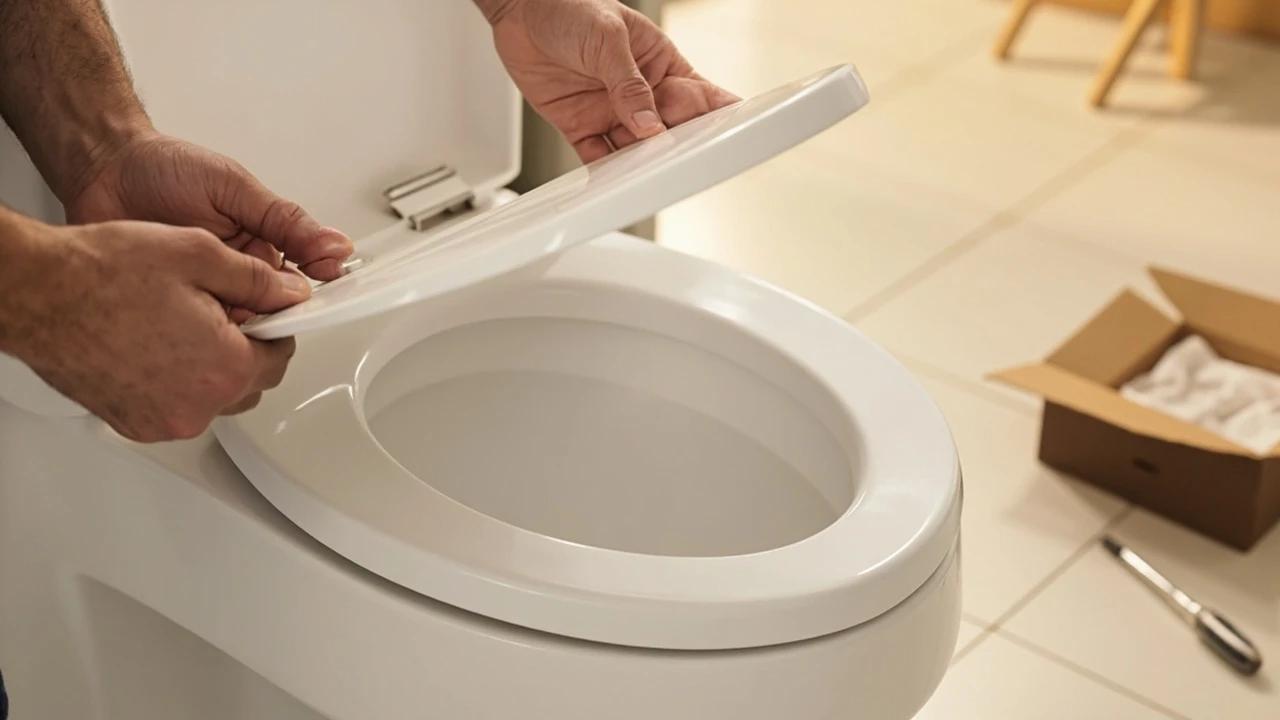 Easy25 min
How to Replace a Toilet Seat
A cracked, stained, or wobbly toilet seat is one of the cheapest, fastest upgrades in the house — a new seat runs $20-50 and the swap takes about 20 minutes with nothing more than a screwdriver. This guide covers both standard and soft-close (quick-release) seats, how to measure so the new one actually fits, and the part everyone gets stuck on: freeing corroded bolts without cracking the bowl.
 Medium2h 30m
How to Install or Replace a Toilet
Replacing a toilet is one of the most satisfying half-day plumbing projects a homeowner can take on — a new comfort-height, water-saving toilet runs $120 to $400 in parts and tools, versus the $255 to $615 a plumber charges to swap one. The job is mostly muscle and patience, not skill: the one part that truly matters is seating the seal right so it never leaks. This guide covers buying a toilet that actually fits your rough-in, removing the old one cleanly, and setting the new one level, sealed, and rock-solid.
 Easy30 min
How to Replace a Shower Head and Shower Arm
Swapping just the shower head is a 10-minute job, but if the arm (the pipe curving out of the wall) is corroded, leaking, or the wrong length for a new rain head, you'll want to replace both. The whole job costs under $50 and takes half an hour — the one trick that separates a clean swap from a flooded wall is holding the arm steady so it doesn't snap off inside the tile. This guide covers removing a stuck arm, prepping the in-wall fitting, taping the threads right, and testing leak-free.
You Might Also Like
 Medium2 hrs
How to Prune Fruit Trees
Regular pruning is the most important annual task for fruit tree health and productivity. Properly pruned trees produce larger, higher-quality fruit, resist disease better, and live significantly longer than unpruned trees.
 Medium30 min
How to Troubleshoot a Microwave That Won't Heat
A microwave that runs — light on, turntable spinning, timer counting down — but leaves food stone cold is one of the most common appliance failures, and about half the time the cause is something you can fix in five minutes for free. This guide walks the diagnosis from the easy stuff (demo mode, power level, a tripped GFCI, a dirty door latch) to reading the failure signature that tells you the high-voltage circuit is gone, then helps you make the repair-or-replace call with real numbers.
 Hard4 hrs
How to Install Crown Molding
Crown molding turns a plain room into a finished one — but it is the trickiest trim to cut, thanks to corners that are never quite square and a profile that has to be cut upside down. This guide walks through the whole job the way a finish carpenter does it: coping inside corners so they stay tight, mitering outside corners, and fastening into framing instead of bare drywall. Expect about half a day for a typical room and roughly one to six dollars per linear foot in materials.