How to Fix a Running Toilet

A running toilet can waste up to 200 gallons of water per day, adding $50 or more to your monthly water bill. The fix almost always involves one of three cheap parts — the flapper, fill valve, or float — and takes under 30 minutes with no special skills required.
What You'll Need
🛠 Tools
📦 Materials
Safety First
- •Turn off the water supply valve before removing any parts. The valve is located on the wall behind the toilet, near the floor.
- •Tank water is clean (it has not contacted the bowl), but wear rubber gloves if you prefer.
Step-by-Step Instructions
Diagnose the Cause
Remove the toilet tank lid and set it on a towel (porcelain lids are heavy and crack easily on hard floors). Listen and watch: if water is trickling into the bowl, the flapper is leaking. If the fill valve keeps cycling on and off every few minutes (called "phantom flush"), the flapper is the culprit. If water is flowing into the overflow tube continuously, the float or fill valve needs adjustment. Understanding which part is failing tells you exactly what to fix.

Do a dye test to confirm a flapper leak: add 5-10 drops of food coloring to the tank water (don't flush). Wait 15 minutes — if colored water appears in the bowl, the flapper is not sealing properly.
Shut Off the Water Supply
Locate the shut-off valve on the wall or floor behind the toilet — it's a small oval handle or knob on the supply line. Turn it clockwise until it stops. Flush the toilet once to empty most of the tank water. Use a sponge to soak up the remaining water in the bottom of the tank. This gives you a dry workspace and prevents spills when you remove parts.

If the shut-off valve is stuck or corroded and won't turn, do not force it — you could snap the valve or the supply line. Use penetrating oil (WD-40) and wait 10 minutes, or shut off the main water supply to the house instead.
Inspect and Replace the Flapper
The flapper is the rubber disc at the bottom of the tank that seals the flush valve opening. Unhook the flapper's ears from the pegs on either side of the overflow tube and disconnect the chain from the flush lever. Examine the flapper: if it's warped, cracked, or feels slimy and deteriorated, it needs replacing. Take the old flapper to the hardware store to match the size (most toilets use a 2-inch or 3-inch flapper). Snap the new flapper onto the same pegs and reattach the chain.

A universal flapper ($4-8) fits most toilets. Korky and Fluidmaster are the two most reliable brands. If you have a Kohler or American Standard toilet, check for model-specific flappers — some use proprietary canister-style seals instead of traditional flappers.
Adjust the Chain Length
The chain connecting the flapper to the flush lever needs exactly the right amount of slack — about 1/2 inch. If the chain is too short, it holds the flapper slightly open, causing a constant leak. If it's too long, it can get caught under the flapper and prevent a full seal. Hook the chain to the flush lever hole that gives you 1/2 inch of slack when the flapper is closed. Trim excess chain with wire cutters or bend the last link to keep it from tangling.

Adjust the Water Level
The water level in the tank should sit about 1 inch below the top of the overflow tube — a line is usually marked on the inside of the tank or on the overflow tube itself. If water is flowing over the overflow tube, the float is set too high. For a ball float (round ball on a metal arm), bend the arm gently downward to lower the water level. For a cylinder float (plastic cylinder that slides on the fill valve), squeeze the spring clip and slide the float down the rod about 1/2 inch at a time. Test by turning the water back on and checking where the level settles.

If your toilet has a fill valve with an adjustment screw on top (common on Fluidmaster 400A), turn it clockwise with a flathead screwdriver to lower the water level — each full turn lowers the level about 1/2 inch.
Replace the Fill Valve if Needed
If adjusting the float doesn't stop the running and the fill valve hisses, vibrates, or won't shut off, replace the entire fill valve. Disconnect the water supply line from the bottom of the tank using adjustable pliers. Unscrew the lock nut on the outside of the tank that holds the fill valve in place. Lift out the old valve. Insert the new fill valve (Fluidmaster 400A is the industry standard at $8-12), adjust its height so the overflow tube sits 1 inch below the critical level mark, and tighten the lock nut. Reconnect the supply line and the refill tube to the overflow tube.

Do not overtighten the lock nut — hand-tight plus a quarter turn with pliers is enough. Overtightening can crack the porcelain tank, which means replacing the entire toilet.
Turn On Water and Test
Open the shut-off valve by turning it counterclockwise. Let the tank fill completely — this takes 1-2 minutes. Watch the water level: it should stop about 1 inch below the overflow tube. Listen for any hissing or trickling sounds, which indicate a leak. Flush the toilet 3-4 times and confirm that it fills, stops, and holds water silently between flushes. Check the supply line connection and the bottom of the tank for drips.

Perform the Final Dye Test
Once the tank is full and the water has stopped running, add 5-10 drops of food coloring to the tank. Wait 15-20 minutes without flushing. Check the bowl — if the water in the bowl remains clear, your repair is complete and the flapper is sealing correctly. If colored water appears in the bowl, the flapper still isn't seating properly: check that the chain isn't caught underneath, the flapper ears are seated on the pegs, and the flush valve seat is clean and free of mineral deposits. Replace the tank lid and you're done.

If the flush valve seat (the ring the flapper sits on) is rough or has mineral buildup, scrub it gently with a Scotch-Brite pad or fine-grit emery cloth. Even a new flapper can't seal against a pitted seat.
Frequently Asked Questions
How long does it take to fix a running toilet?
+
This project typically takes about 25 min. The guide includes 8 steps with detailed instructions for each.
What tools do I need?
+
You will need: Adjustable pliers or channel-lock pliers, Flathead screwdriver, Bucket or large towel, Sponge, Rubber gloves. Materials include: Universal toilet flapper (2-inch or 3-inch, match your existing one), Toilet fill valve kit (if fill valve is faulty), Food coloring (for dye test).
Is this a good project for beginners?
+
Yes! This is rated as an easy project that most homeowners can complete with basic tools and no prior experience.
Community Tips
💬 Sign in to share tips with the community
Sources & further reading
- Fix a Leak Week — EPA WaterSense
- Residential Toilets — EPA WaterSense
More Plumbing Guides
View all → Easy45 min
How to Repair a Shower Diverter Valve
When you pull the diverter knob and water still pours from the tub spout instead of the showerhead, the fix is usually a worn washer or mineral buildup — not a $200 plumber visit. This guide covers the three most common diverter types (tub spout, three-valve, and two-valve) and walks you through cleaning, replacing washers, and swapping the diverter if needed, all in under an hour with basic tools.
 Easy1h 30m
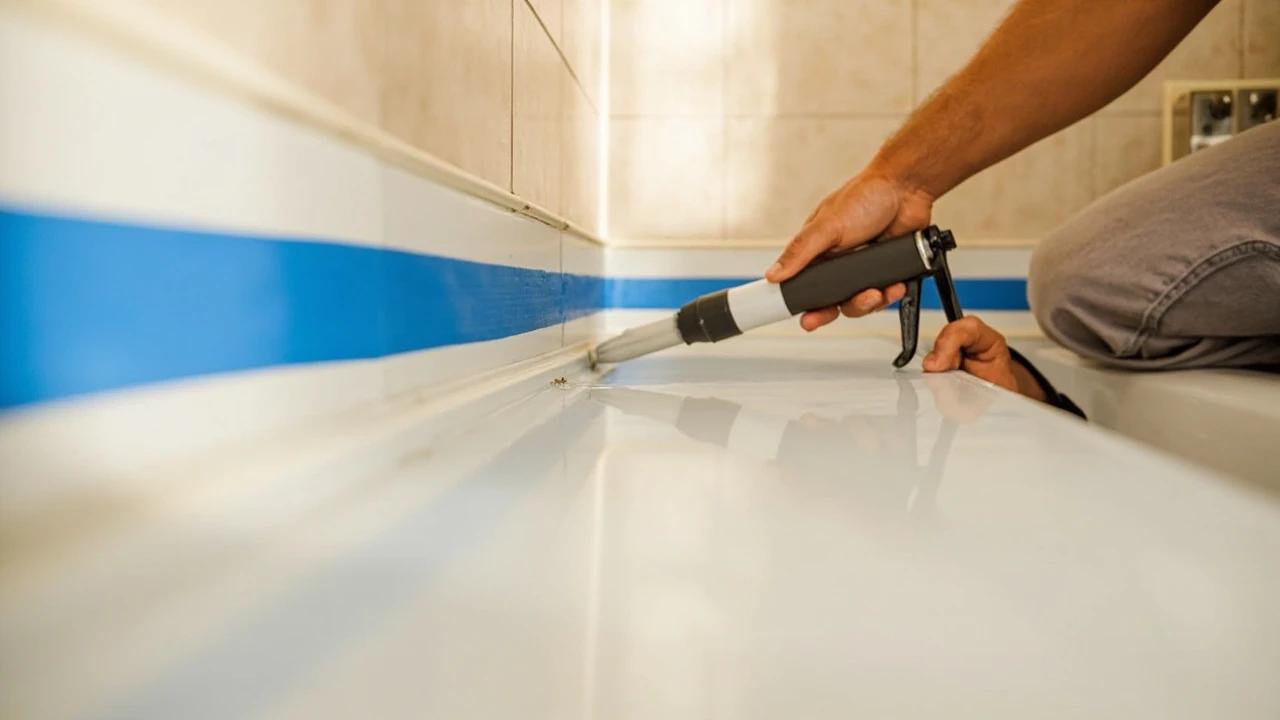
How to Re-Caulk a Bathtub or Shower Surround
Mildewed, cracked, or peeling caulk around a bathtub isn't just ugly — it's letting water reach the drywall and studs behind the wall, which turns a $10 caulk job into a thousand-dollar tile-and-framing repair. This guide walks through removing the old caulk completely, treating mold, masking and tooling a clean single bead of 100% silicone, and the curing schedule that keeps the new joint waterproof for years.
 Medium1 hr
How to Fix Low Water Pressure
Weak, trickling water usually has a cheap, findable cause — a clogged aerator, a half-closed valve, or a tired pressure-reducing valve — long before it means re-piping the house. This guide walks the diagnosis in order: first pin down whether it's one fixture or the whole house (and hot-only or both), then work each cause with a $12 pressure gauge as your guide. Most fixes are free or under $30; you'll also learn the few signs that mean it's time to call a plumber.
You Might Also Like
 Medium45 min
How to Install a Ceiling Fan
Replacing a light fixture with a ceiling fan improves air circulation in summer and can reduce heating costs in winter by circulating warm ceiling air downward. Most installs take 45-60 minutes.
 Easy3 hrs
Spring Lawn Care Checklist
What you do to your lawn in the first six weeks of spring determines its health for the entire growing season. Follow this sequence to fix winter damage, encourage deep roots, and crowd out weeds before they establish.
 Easy1 hr
How to Start a Compost Bin
Composting converts kitchen scraps and yard waste into rich, free fertilizer that dramatically improves garden soil. Setup takes under an hour and once running, the bin requires minimal effort for big rewards.